Lately, many users have been facing issues with the iPhone camera blinking, which can be incredibly frustrating as it hinders your ability to capture clear and focused photos or videos.
Issues like these are somewhat common when it comes to iOS software, we recently addressed effective fixes for ‘FaceTime Not Working’ issue on iPhone. Just like that one, the ‘iPhone camera keeps blinking’ issue is also easily manageable.
If you are also facing this problem, fret not! We have compiled a comprehensive guide to address the blinking issue with your iPhone camera.
In this guide, you’ll not only find the reasons why your iPhone camera is blinking but also effective solutions to fix this problem.
So, without any further delay, let’s dive right in and explore the details—
If your iPhone camera keeps blinking, there could be several reasons for this issue. To mention these are some of the common causes behind iPhone camera blinking—
Now that you know the reasons why does my iPhone camera keep blinking, let’s explore the possible solutions to resolve this bothersome issue—
To troubleshoot and resolve the iPhone camera blinking issue, you can try the following solutions—
Note: Work your way down the line until you find the solution that effectively eliminates the camera blinking problem.
First things first, it is suggested that you try using the camera in different apps such as Snapchat, Instagram, or WhatsApp to see if the blinking continues. Doing so can help you determine if the problem is specific to the camera app or more widespread.
When you run multiple apps simultaneously on your iPhone, not only do they consume system resources, but can sometimes cause conflicts and affect the proper functioning of the camera.
So, to fix the camera blinking problem, you should start by closing all the apps running in the background.
This action of yours not only frees up valuable system resources but also helps you avoid potential conflicts between the camera app and other apps.
Basically, by doing so, you create a clean environment for the camera to function properly and this may help you solve the iPhone camera blinking problem.
Sometimes, the iPhone camera starts blinking or flickering due to software glitches as well, which can happen after an iOS update or due to a bug in the camera app. However, these temporary glitches or bugs can be effectively addressed by giving your iPhone a quick restart.
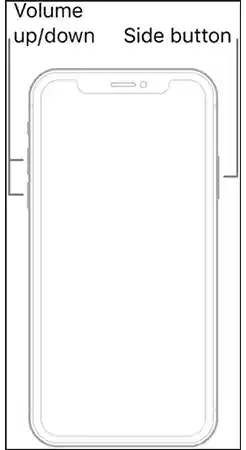
When you restart your iPhone, it can often clear these glitches and resolve software-related issues, providing a quick and efficient solution to the camera blinking or flashing problem.
However, after restarting your iPhone, be sure to double-check the camera to make sure the problem is resolved successfully.
Whether you know it or not, a low battery level can affect the performance of your iPhone and all of its apps, including the Camera app. Well, because when your iPhone’s battery is running low, it may not have enough power to operate the camera correctly, thus, causing blinking or other problems.
So, ensure your iPhone has sufficient charge before using the camera to avoid this problem. Here’s how—
Step 1: On your iPhone’s home screen, tap the ‘Settings app.’
Step 2: Scroll down and select ‘Battery.’
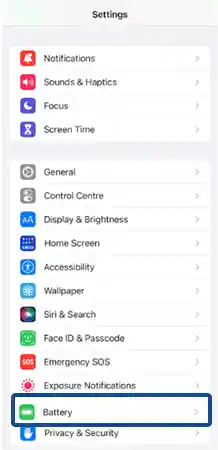
Step 3: Check the ‘Battery Percentage’ displayed at the top of the screen.
If it’s less than 20-30%, consider charging your iPhone to a sufficient level before using the camera.
Although the LED Flash for Alerts is designed to notify you by flashing incoming messages and notifications, enabling this feature while using the camera may interfere with its operation, making it unpredictable and causing it to blink randomly.
So, considering this, you can disable the LED flash for alerts to eliminate any possible conflicts with camera functionality.
The process to disable LED flash for alerts is as easy as following these 4 simple steps—
Step 1: Open the ‘Settings app’ on your iPhone.
Step 2: Inside settings, scroll down and select ‘Accessibility.’
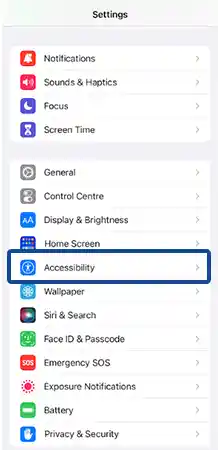
Step 3: Then, tap ‘Audio/Visual’ or ‘Audio/Visual Accessibility’ depending on your iOS version.
Step 4: After that, look for ‘LED flash for alerts’ and turn it “OFF.”

If the LED Flash for Alerts option is grayed out, it means it is disabled. Once disabled, go and check your camera to see whether the issue is resolved yet or not.
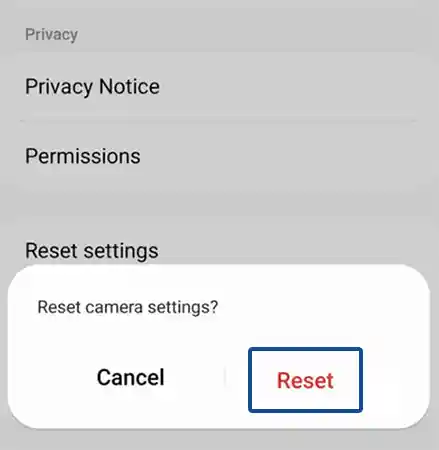
It is quite obvious that sometimes camera settings can get corrupted or misconfigured, leading to erratic behavior of the camera, like blinking. However, resetting the camera settings to their default values can help in resolving any software-related issues. Basically, it will undo any unwanted changes and set the camera back to its standard settings, potentially fixing the blinking problem.
However, resetting camera settings to their default values can help resolve any software-related issues. To be precise, this will undo any unwanted changes and reset the camera back to its standard settings, potentially fixing the blinking problem.
So, considering this, in order to reset camera settings, you need to follow the following steps—
Step 1: Launch the ‘Settings’ app on your iPhone.
Step 2: Then, scroll down and select ‘Camera.’

Step 3: After that, scroll to the bottom and tap on ‘Reset Settings.’
Step 4: Now, tap ‘Reset’ and confirm this action when prompted to finally reset camera settings to their defaults.
Typically, the macro mode on the iPhone 13 Pro and iPhone 14 Pro models gets automatically enabled when the object is too close to help you capture a clearer picture with more details and these pictures you can later convert into PDFs as well. But sometimes your iPhone struggles to achieve accurate focus and frequently changes between its wide and ultra-wide lenses, which causes camera flicker.
So, to fix the blinking of your iPhone camera, what you need to do is turn off the automatic macro mode by following these steps—
Step 1: Open your iPhone’s ‘Settings app.’
Step 2: Inside settings, tap on ‘Camera.’

Step 3: After that, simply toggle off the ‘Macro Control’ option.

Alternatively, you can disable it by selecting the flower symbol while taking a photo, and also, changing the zoom level to .5x helps you solve the problem.
Now that you have successfully turned off Macro Control, test your camera. If your iPhone’s camera is still blinking repeatedly, you can turn it back on by going to ‘Settings > Camera’ and then proceed to try the next lined solution.
If you encounter a camera flickering issue, especially while recording videos, it could be because your iPhone is unable to select the lens to capture the video in the best way. So, in order to prevent camera switching during recording, you must lock your camera this way—
Step 1: Open ‘Settings’ of your iPhone.
Step 2: Inside settings, tap on ‘Camera.’
Step 3: Then, hit the ‘Record Video’ option.

Step 4: After that, you just have to turn on the ‘Lock Camera’ option. Or, you can also set the recording resolution to ‘1080p at 60FPS’ for better video quality.

Your iPhone uses Live Photos to capture the moments 1.5 seconds before and after the photo was taken. However, on some occasions, this feature may interfere with your still photos.
So, maybe turning it off will change the circumstances or situation you are currently facing.
To turn off the Live Photos feature—
Step 1: Open the ‘Camera’ in photo mode.
Step 2: Then, just tap on the ‘Live Photos’ button (the circle icon at the top right corner) to turn it off.
However, this will only pause Live Photos until you turn off the camera. So, if you want to disable Live Photos permanently, consider these steps instead—
Step 1: Navigate to ‘Settings.’
Step 2: Inside settings, tap on ‘Camera.’
Step 3: Then choose ‘Preserve Settings.’
Step 4: After that, simply turn off the ‘Live Photos’ option.

If this doesn’t fix the blinking problem, note that it could be due to an exposure problem.
As just said, it is also possible that the flicker is not caused by your iPhone camera but by the lighting in the room, as it has been observed that LED or fluorescent lighting can interfere with the camera’s shutter rate.
In low-light environments, your iPhone camera aims to maintain automatic exposure while attempting to achieve the proper balance, and as the camera adjusts to challenging lighting conditions to capture the best possible image, you may notice flashing or blinking.
Well, if that is the case, changing or balancing the exposure is the ultimate way to stop your iPhone camera from flickering. So, here’s how you can change or balance the exposure on your iPhone’s camera—
Step 1: Open the ‘Camera App’ on your iPhone.
Step 2: Then, in the Camera app, tap the ‘White Arrow’ in the top middle of your screen.
Step 3: As you do so, a range of ‘Settings’ will appear under your viewfinder. From them, tap the circle with a ‘+ and –’ to open exposure settings.
Step 4: Now, slide your finger to ‘Change Exposure’ until the image becomes clear and the bright light subsides.
Needless to say, every iOS update brings new features and enhancements to system apps to increase stability, and your iPhone may lag if you don’t install updates regularly. So, make sure your iPhone has the latest software updates installed. If not, here’s how you can update your iOS—
Step 1: Open ‘Settings’ on your iPhone.
Step 2: Inside settings, navigate to the ‘General’ section.
Step 3: tap on ‘Software Update.’
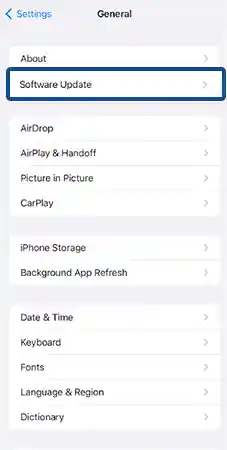
Step 4: Now, tap ‘Download and Install’ if any update is pending.
However, if the installation is improper and causing more trouble, note that you can downgrade your iOS or remove the software update and reinstall it. While you consider doing so, remember to back up your iPhone before downgrading.
Last but not least, it is to be noted that if none of the above solutions work for you, then there might be a hardware issue with your iPhone camera.
Camera blinking can be caused by a failure in your optical stabilization system. Furthermore, exposing your iPhone to water or moisture can cause significant damage to the camera module, resulting in the camera system malfunctioning.
However, worry not. In that scenario, it is best suggested to contact Apple Support or visit an authorized service center for further assistance and possible repairs.
That is all! Dealing with a blinking or flickering iPhone camera can be frustrating, especially when it prevents you from capturing precious moments. Although the process of getting rid of this problem may require some patience and trial and error, by following the solutions outlined in this guide, you can restore your camera to its normal state.
However, if the camera blinking problem is indeed caused by a software issue, you can expect a future update from Apple to fix it and in the meantime, these are the different ways you can go about fixing your iPhone camera flickering.
And most importantly, remember to approach these solutions with caution and avoid using any unauthorized third-party apps or services in order to respect the terms of service for your device and associated apps.
Next, Read: Top 30 Planner Apps for iPad and iPhone in 2023!
A: If your camera is not working at all, there is a possibility that there is a problem with the camera hardware.
A: If the pictures clicked by your camera are blurry or distorted, then there might be a problem with the camera lens. The lens may be scratched, cracked, or damaged.
A: If the camera is having trouble focusing, there may be a problem with the autofocus mechanism. The autofocus mechanism could be dirty, damaged, or faulty.
A: If your pictures are coming with incorrect color then there might be a problem with the camera sensor. It could possibly be dirty, damaged, or defective.
A: Strange noises may indicate a problem with the autofocus mechanism, camera sensor, or other internal components. So, if you hear strange noises from the camera when taking pictures, it is possible that the camera is malfunctioning.
Sources: