I still remember the global pandemic days when all of a sudden the entire work and business interaction shifted online. Luckily I was able to swiftly balance my work life because Share Screen on FaceTime has been my savior, then and now. Thanks to the FaceTime share screen that my work never suffered during lockdown days.
The share-play FaceTime feature is so brilliant that it made my quarantine life fun. If you are a newbie to the iOS army and want to know ‘how to share screen on FaceTime’, follow along with the article till the end. Trust me, you will learn something new, and it will be fun to use FaceTime.
So grab your concentration and iOS device to learn how to screen share on FaceTime!
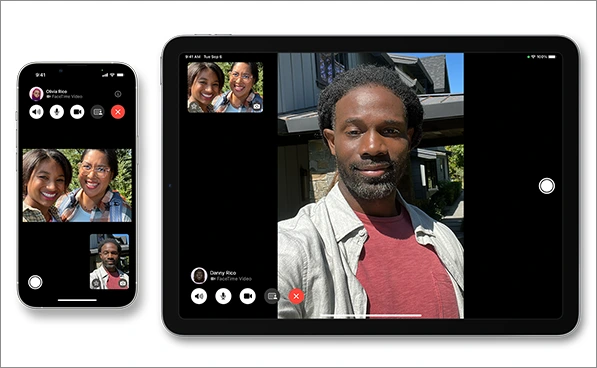
The FaceTime share screen feature of Apple is my personal favorite because it allows people on a FaceTime call to look at photos, documents, or screen presented on the call. The audio and video contents of FaceTime screen-sharing calls are completely safe because they are protected by end-to-end encryption.
It means that no one except the sender and receiver can access them, and even Apple can’t decrypt that data. This feature is beneficial for troubleshooting and group presentations. So if you are an Apple user, you should definitely try your hands on the FaceTime share screen feature.
Note: To share the screen in a FaceTime call, everyone connected in the call must be running iOS, iPadOS 15.1, macOS Monterey 12.1, or a later version.
Do you have a weak hand on technology and ponder how to share screens on FaceTime in iPhone or iPad? Worry not. The following steps will help you get along with the screen-sharing feature of FaceTime.
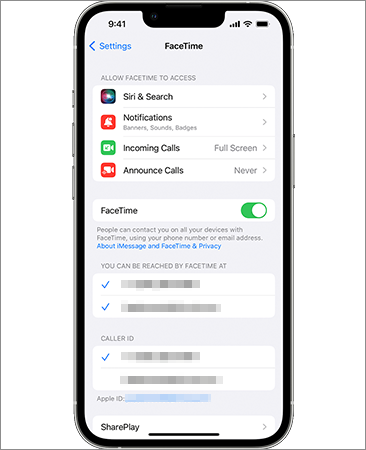
Step 1: First, turn on FaceTime by navigating to settings >> FaceTime >> Turn on FaceTime.
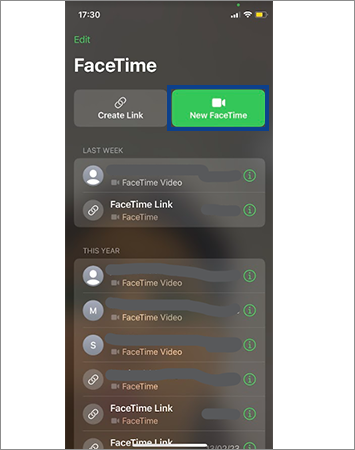
Step 2: Open the FaceTime app.
Step 3: Then, click on the ‘New FaceTime’ option.
Step 4: Now, enter the contact name, email, or mobile number.
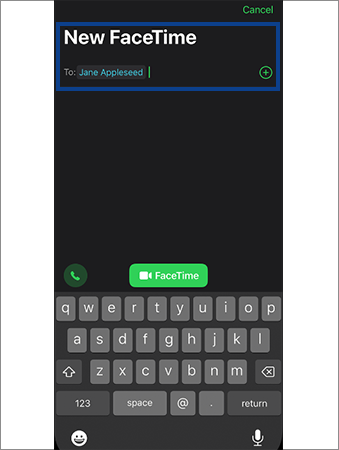
Step 5: Hit the icon of ‘FaceTime’ to initiate a FaceTime call.

Step 6: After the call is connected, tap on the ‘Share Content’ icon present at the top of the screen.
Step 7: Tap on the ‘Share My Screen’ option in the dialog box.

Synopsis: Turn on FaceTime >> new FaceTime >> enter the contact name, number, or email >> FaceTime >> share content icon >> share my screen.
That’s it now your screen is being shared with the other people connected on call. The best part is that you can minimize the call window and navigate to other apps or files that you want people on the call to see by swiping up from the bottom of the screen.
For instance, I used to open the planner app on my iPad and then plan the entire week’s schedule and goals with my teammates on FaceTime Share Screen. Now that you have learned how to screen share on FaceTime let’s talk about how to stop FaceTime share screen.
Discontinuing screen sharing on iPhone or iPad is easy-peasy as you can stop screen sharing just in two clicks. The below-given instructions will assist you in stopping screen sharing on FaceTime: –
Step 1: Tap on the call window to maximize it.
Step 2: Now, click on the ‘Share Content’ icon at the top and your screen-sharing session will end.
Ending screen sharing won’t end your FaceTime call, it will only stop sharing your screen. The feature of screen sharing during a FaceTime call is available for almost all iOS devices. So if you are a Mac user refer to the subsequent section to know how to screen share on Mac FaceTime.
‘Can I share my screen on FaceTime Mac?’ is a commonly asked question on Google related to the FaceTime share screen.
Why not! Mac is a product of Apple and similar to other iOS devices you can also share screens on Mac during FaceTime. Here’s how to screen share on Mac:-
Step 1: Open the FaceTime app on your Mac.
Step 2: Now, tap on the option of ‘New FaceTime’ to initiate a call.
Step 3: Enter a phone number, email, or contact name in the designated column.
Step 4: Tap on the ‘Share Screen’ icon present at the bottom left side of your Mac screen.
Step 5: Then, select the option of ‘Screen’ if you want to share your entire desktop.

Step 6: Tap on the ‘Share This Screen’ option to confirm screen sharing.
Step 7: And if you want to share a specific window on your desktop, click on the ‘Window’ option.

Step 8: Next, select the window you want to share and then click ‘Share This Window’ to confirm.
Step 9: In case, you changed your mind and want to change the screen that you’re sharing, click on the ‘Change Shared Screen’ option. And if you want to change the shared window tap on the ‘Change Shared Window’ option.
Synopsis: New FaceTime >> enter the contact name, number, or email >> share screen icon >> screen or Window >> share this screen or share this Window >> change the shared screen or change shared window
Now that you have understood how to share the screen on FaceTime Mac, let’s see how you can stop sharing your screen.
When you are done sharing your screen, just click on the option of ‘Stop Sharing Screen’ or ‘Stop Sharing Window’ to end the session. Remember that you need to click the stop sharing window option if you are sharing a particular window otherwise click on the stop sharing screen.

Note: One can share anything on FaceTime screen sharing except the premium content that requires a subscription or purchase. For example – Amazon, Netflix, etc.
Do you know apart from screen sharing, you can also take over screen sharing by replacing existing share-play activity? The next section will help you know how to take over screen sharing.
Till now, you must have understood that share play gives other people a real-time view of apps and things presented on your screen. But you will be amazed to know that you can take over screen sharing from someone else.
I am telling you about this feature because it helped me survive those group presentations and projects in my office where I had to present the annual progress report with my fellow office mates. You can easily take over screen share with anyone else without disturbing the ongoing session. The steps written below will help you take over the screen from someone else: –
Step 1: In an ongoing screen share session firstly, tap on the ‘share content’ icon present at the top.

Step 2: And then, click on the option of ‘Share My Screen.’

Step 3: Select ‘Replace Existing’ and now the other people on the call will see your screen.
Step 4: Lastly, tap on the share content icon again to end or screen sharing session.
That’s it now you can present your screen and continue your presentation. This feature is handy for giving group presentations. Honestly, the screen sharing feature makes me wonder, who needs Zoom when you can share your screen and present in front of others in a FaceTime call? Apart from this, you can also hand off a FaceTime call to another device.
Apple has never disappointed its users when it comes to upgrading technology. It has successfully enabled switching an ongoing FaceTime call to another device. So, follow the following steps to hand off a FaceTime call to another device: –
Essentials for Using Handoff Feature
Before handing over a FaceTime call, make sure that you are signed in with the same Apple ID on both devices.Both devices should have a minimum relevant software version installed, like iOS 10, iPadOS 13, macOS 10.10, watchOS 1.0, or later versions.The devices should be within Bluetooth range of one another (at least 33 feet or 10 meters).
Step 1: First, go to ‘Settings’ and tap ‘General.’
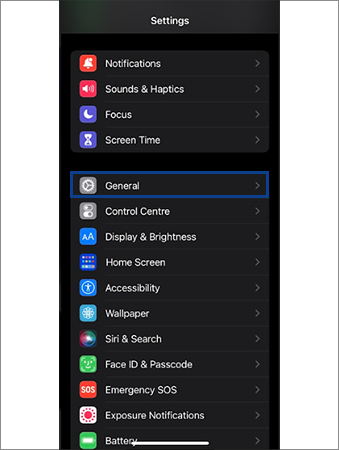
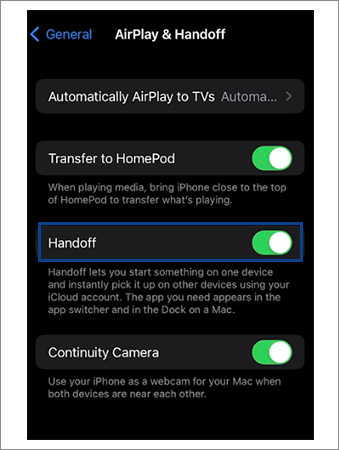
Step 2: Now, click on Airplay & Handoff option.

Step 3: Enable handoff by turning it on.
Step 4: Next, enable the handoff, on the other device to which you want to switch the FaceTime call.

Step 5: Now, when you will get a FaceTime call, you will get a notification on all the FaceTime apps on all the connected devices.
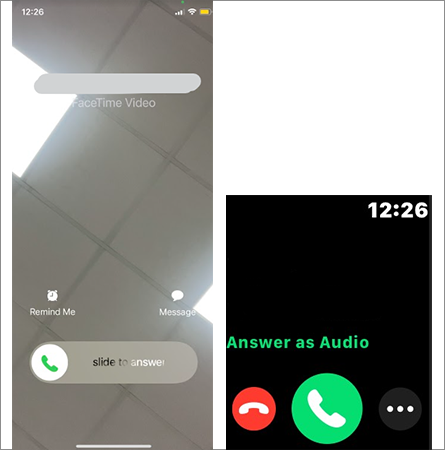
Step 6: Tap on the ‘Switch’ option present at the bottom of your screen to switch the call to another device.
Step 7: Then, you will receive a notification on the device you are switching to. Click on the icon of ‘Switch’ to switch the FaceTime call.
Now your call is switched from one device to another device without disrupting your conversation. That was all about how to share screen on FaceTime, let’s explore some unknown features of the FaceTime share screen. If you want to make more than video calls, then the next section is a must-read for you.
FaceTime enhances your video calling experience and enables you to make more than just simple video calls. There are many hidden features of FaceTime, and knowing them can help you get more from FaceTime calls. So, let’s discuss some features of FaceTime: –
That was how to share screen on FaceTime. Hopefully, the article provided you with comprehensive knowledge about sharing screen on FaceTime calls. And yes in case you ever encounter FaceTime not working issues don’t panic you can always troubleshoot them. If you have any questions feel free to ask them in the comment section.
Ans: An outdated operating system is a major reason behind the inability to share screen on FaceTime. If the device is not running on iOS 15.1 you won’t be able to use the FaceTime screen share feature. To confirm whether your operating system is outdated, try to access the share play function in your device and if it appears blank, you need to upgrade your operating system.
Ans: Following are the reasons for a black screen during FaceTime: –
Ans: You can stream the apps that have partnered with Apple for SharePlay. The list of such apps includes some popular streaming apps like Hulu, HBO Max, Spotify, Apple Fitness Plus, ESPN Plus, TikTok, Twitch, and many more.
Source: Apple Support
Also Read