

Did you pop the SD card into your computer, open the drive, and get nothing? No photos, no videos, maybe not even a folder, or the computer says the drive is not accessible, corrupted, or unreadable. Yet your camera still shows every picture you clicked. It happened to me all of a sudden. I know that’s strange, and a little scary, especially when those pictures come from a trip or an event you can never record again.
Here, you will know why that happens, which easy fixes you can try first, and how to get your pictures back safely.
I’ll begin with an example: think of your card as a locked room with a door and a guest list. Inside sit your photos, and the computer needs both the door and the list to see them. Break either one, and the room seems empty.
Only a few reasons cause this. A worn-out card reader or a dusty slot can stop the computer from reading the card well. Files can also become hidden, often because of a virus. As in my case, the card contacts seemed dusty and damaged.
Many cards get a lock on them, which blocks normal access. And now and then the file system gets damaged after a bad eject or a sudden power cut, so the computer cannot read the guest list anymore.
Another one is easy. Maybe your camera saved the pictures to its own memory and not to the card at all. Give a quick look to what is predictive maintenance before anything else.
These take a minute or two, and they might solve the issue you are facing.
Try a different USB port first. Then swap the card reader if you have a spare, since cheap readers fail more often than the cards do. Next, notice the tiny lock switch on the side of the card and slide it to the unlocked spot. Test the card on another computer too. Pictures showing up there? Your first machine is then the real issue.
Open File Explorer on Windows and check whether the card has a drive letter. Cards without a drive letter can stay hidden even though they are plugged in. Searching Disk Management for the card and adding a new letter fixes this in seconds.
Invisible files are a common reason for an empty-looking card, and a virus is often behind them. The pictures are there, but the computer simply does not list them.
On Windows, open File Explorer, click View, and tick the box for Hidden items. Look at the card again. Spot a faded DCIM folder? There is your culprit.
Nothing appeared? Launch Command Prompt as an administrator and type this, replacing X with your card’s drive letter:
attrib -h -r -s /s /d X:\*.*
That command removes the hidden, read-only, and system tags from each file on the card. Press Enter, give it a moment, and then open the drive again. Running an antivirus scan on the card before you copy anything is a smart move too. If you are having a totally different issue like me, where your card is corrupted, unreadable,e and not showing up at all. Try the fixes below.
Say the card still looks empty, unreadable, corrupt, or Windows calls it RAW, or the files open as broken. Stop right there. Please do not format the card or run repair tools yet, because every one of those can overwrite the very data you want back. I did the same.
Recovery software can still read a card when Windows cannot. Stellar Photo Recovery scans the card itself and finds photos, videos, and audio files even when the folder view displays nothing. Even though my card was unreadable on the computer, as shown below with Removable Disk F:, this tool successfully read and scanned it. I was relieved.

Also, the tool supports SD, SDHC, SDXC, and microSD cards, along with other drives. Since my card was finally detected by the tool, here are the steps I followed.
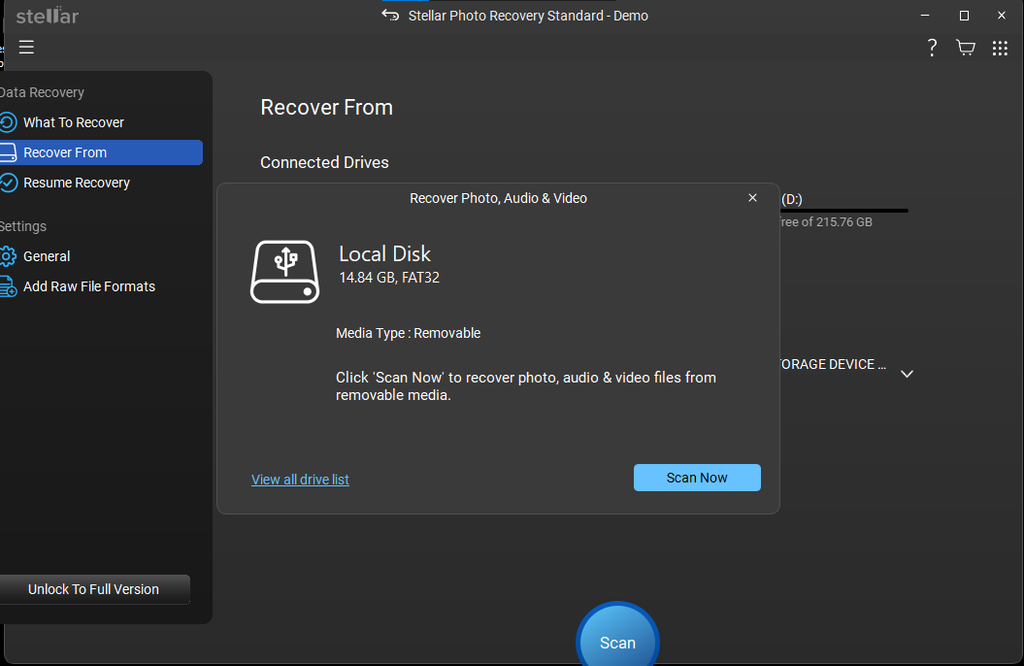
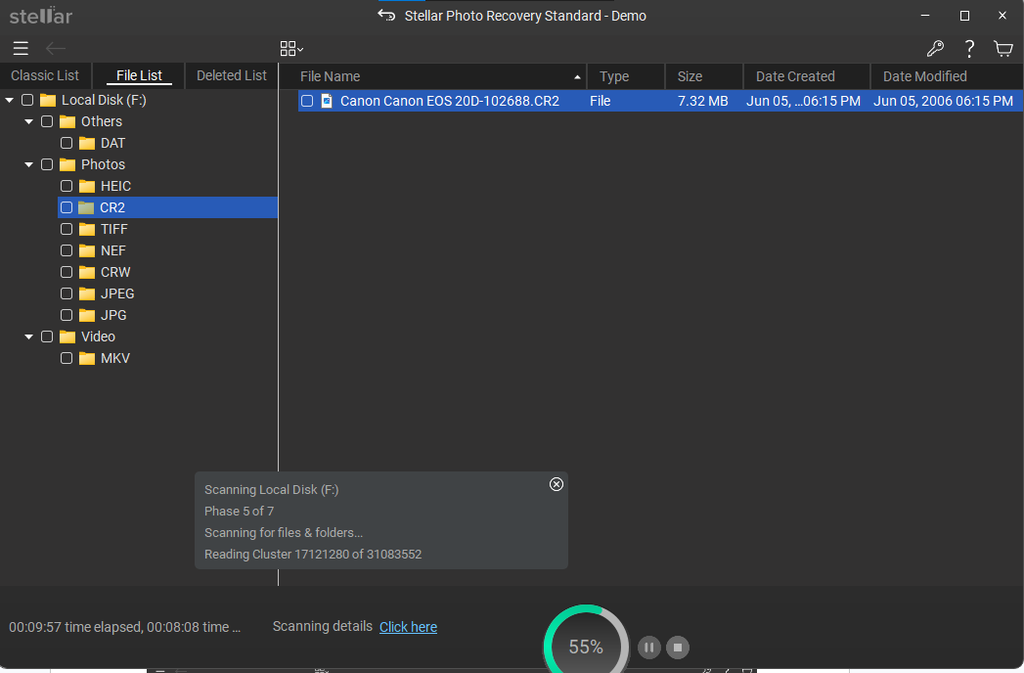
Double-clicking on the file showed me a wide preview of the photos (or videos) the scan finds, so you know they are absolutely fine.
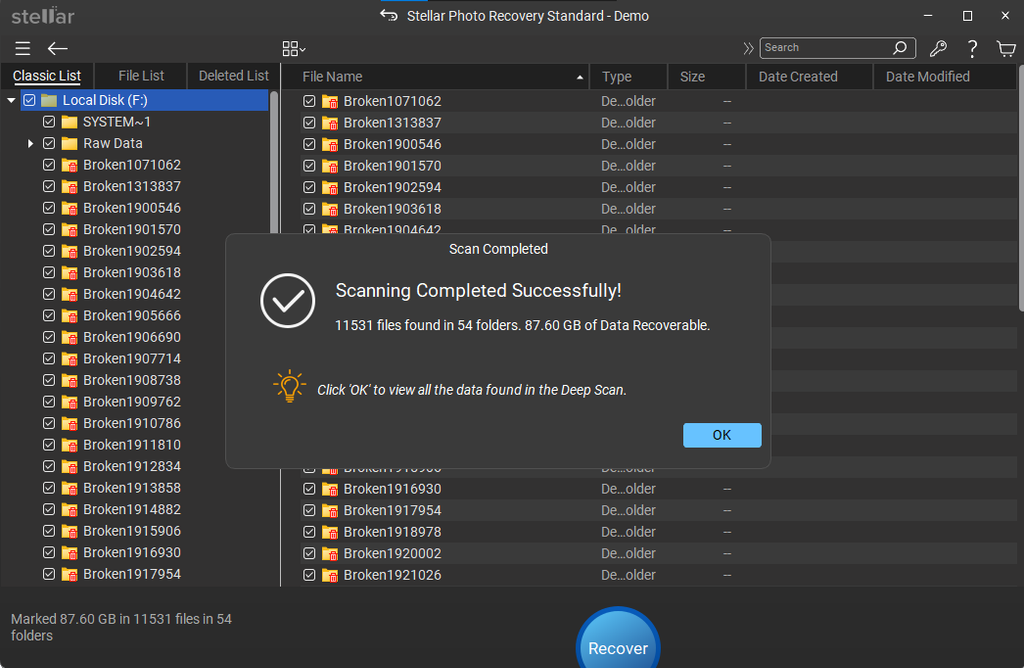
However, I hit a setback when I noticed the card was severely corrupted, and some of the recovered files were corrupted. Fortunately, there was a separate fix available for that.
The premium version of the Stellar Photo Recovery tool also offers repair functionality for the corrupted files. You can save all the files and then try the repair later.
Remember one important rule. Save the recovered pictures to your computer, never onto the same card. Otherwise, new files may overwrite the old ones, and that cannot be corrected.
With your pictures recovered and backed up safely, you can try these fixes to repair your SD card.
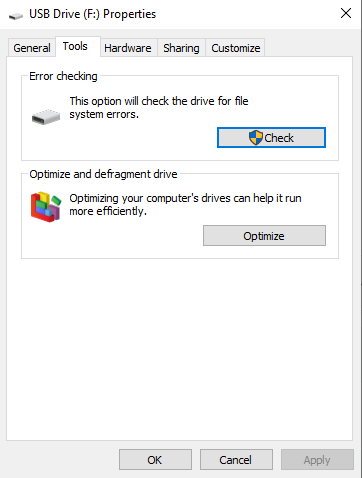
Windows has a built-in checker for this. Right-click the card in File Explorer, select Properties, open the Tools tab, and click Check. Let it scan and repair the drive. Many small issues vanish at this step. If this step fails or returns a broken command, try an alternative method.
CHKDSK is the better option. Open Command Prompt and run as administrator, then type chkdsk X: /f /r, again swapping X for your drive letter.
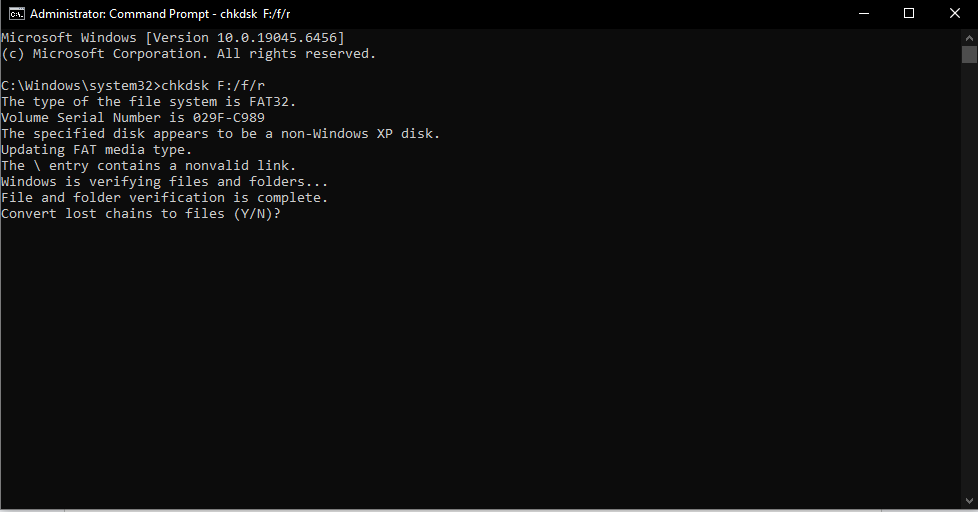
When prompted, pressing Y (Yes) commands Windows to save the recovered, disconnected pieces of data into a newly created folder on the drive, with files labeled as CHKDSK, giving you a chance to rename and recover some missing files later.
But this method is highly risky, and please do not attempt it without recovering your files.
Conversely, choosing N (No) will just delete these lost fragments to free up drive space, resolving the file system error but deleting whatever those fragments contained.
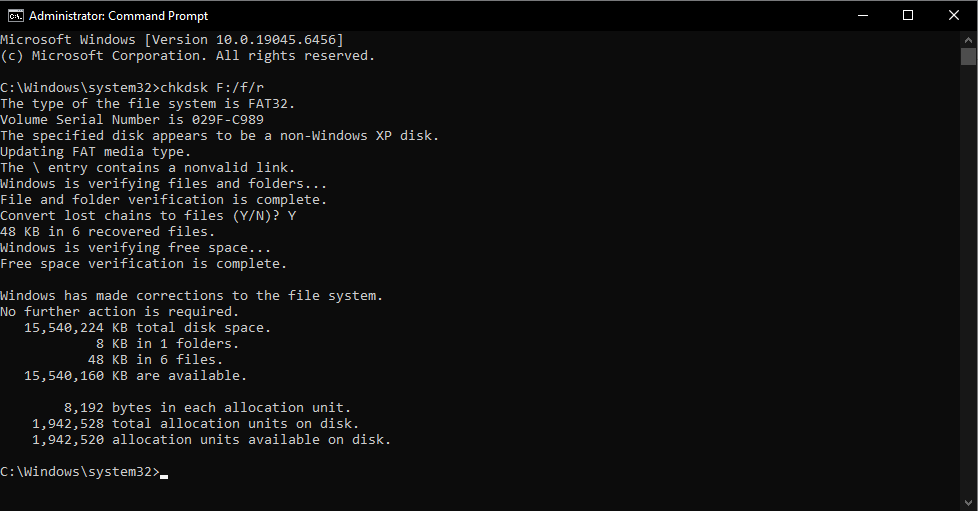
Now, make up your mind and press Y or N. Keep in mind that you may still lose your files even if you press Y, as Windows is usually incapable of truly fixing severely corrupted images or broken fragments.
Old reader drivers can introduce problems too. Head to Device Manager, find your card under Disk drives, and update the driver. Mac users have First Aid in Disk Utility, which does a similar job, or consider similar Mac workarounds for an SD card not showing up.
I was able to fix my SD card with this one step after recovering all my lost photos and videos with the Stellar Photo Recovery tool. However, even after clicking Y, Windows was not able to rescue anything; all my data was lost from the SD card. Glad I recovered them earlier.
You may already get your card fixed with the above steps, but if none of it works, formatting is the final option. By now your photos should be safely recovered on your computer, so there is less to lose.
Formatting starts with a right-click on the card in File Explorer. Pick FAT32 for cards up to 32GB, or exFAT for larger ones, and go with a quick format. Your camera’s menu has a Format selection as well, and cameras often like it best, since it sets up the card the way the camera expects.
An SD card that is unreadable or shows no photos looks like genuinely bad news, but the pictures are often still there. Work with strategy: easy checks first, then unhide files, if these steps fail. Try recovery with photo recovery tools, such as Stellar Photo Recovery, then consider the repair listed above, and format only at the very end.
Remember to eject the card appropriately before pulling it out; this is really important to avoid any more damage to the card once it gets fixed. Once your camera is done writing data, is inactive, or idle, switch it off and then remove the SD card. Never choose cheap, no-name cards, and back up your photos to a computer or the cloud now and then.
Small steps like knowing what OPC UA is save a lot of stress later.
Ans: Your SD card may have hidden files, a damaged file system, faulty contacts, an outdated card reader, a missing card reader, or the computer is unable to read the card.
Ans: Try Stellar Photo Recovery to scan the card and locate recoverable photos and videos. Save recovered files to your computer or another device.
Ans: Open File Explorer, select View, and enable Hidden items. If the files remain hidden, you can use the Command Prompt “attrib” command to remove hidden and system attributes.
