Stuck on Update Requested on iPhone? Try These 9 Working Tips to Fix the Error
Are you trying to install the latest iOS software on your iPhone, but it is stuck on the ‘Requesting updates…’ screen? Many users have reported similar issues while updating to iOS 17/17.5. The error may appear because of a poor Wi-Fi network, storage issue, software glitch, low battery, etc.
To deal with the update requested iPhone error, you can try to connect with reliable Wi-Fi, force stop settings app, clear cookies on your iPhone, free up some space, and so on.
In this guide, we will go over the 9 most effective troubleshooting measures in detail.
Check Your Wi-Fi Connection
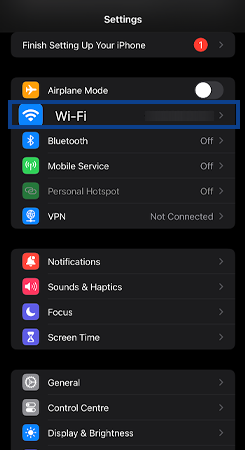
One of the most common reasons behind you getting stuck on the ‘iOS Update Requested’ is the poor Wi-Fi connection. This might restrict you from accessing Apple’s server and installing the iOS update. To make sure, you aren’t connected to a faulty Wi-Fi, follow these steps:
- First, go to iPhone Settings > Wi-Fi.
- Now, tap on the information icon of the network you are connected to.
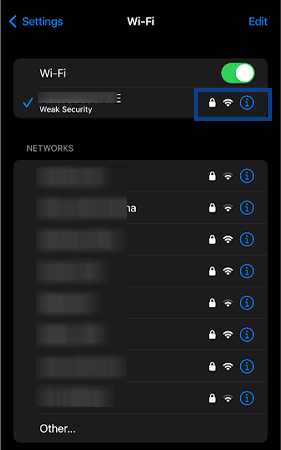
- Next, hit the Forget This Network option.

- At last, reconnect to a reliable Wi-Fi.
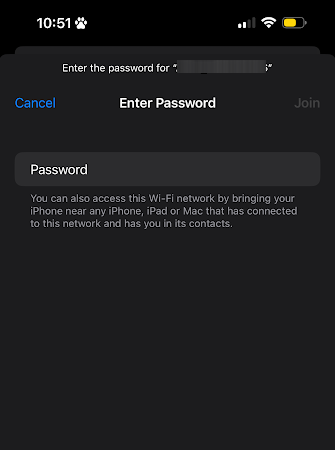
You can also conduct a speed test, check Your Wi-Fi GHz on your iPhone, and see if the battery status is more than 50% while trying to update the software.
Disable the VPN
Using a VPN provides security to your data and browsing activities, but at the same time, it also slows down the network speed and prevents some normal functioning of the phone. That is why, while installing the iOS update, you must disable the VPN. The process for the same is given below:
- Go to Settings on your iPhone > VPN.
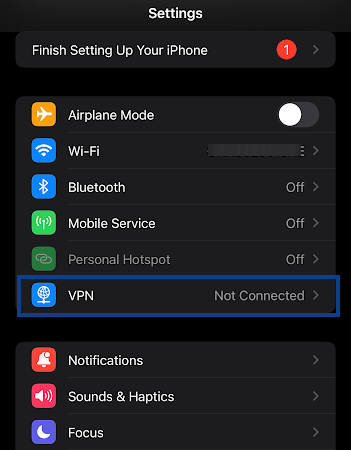
- Toggle off the VPN Status.
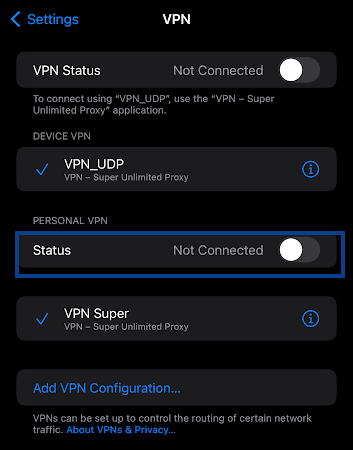
In case, you are using a third-party VPN, open the app and disconnect the VPN from there.
Turn Off Low Power and Low Data Mode
Low power and low data modes help to save battery life and cellular data, but they also limit the functionality of some software. While downloading the iPhone update, it is necessary to keep both these modes off so that they won’t interrupt the process.
- First, go to iPhone Settings.
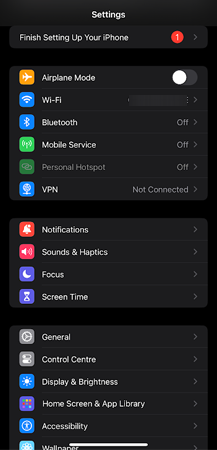
- To Disable Low Power Mode:
- Navigate to the Battery section.
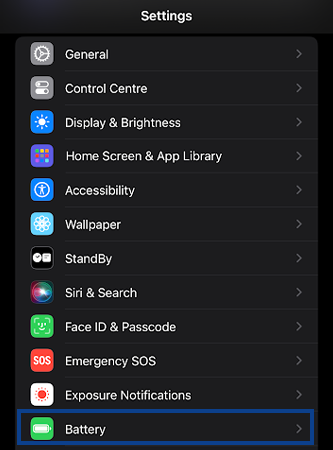
- Toggle off the Low Power Mode.
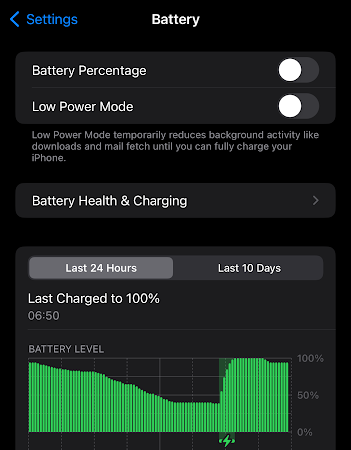
- Navigate to the Battery section.
- To Disable Low Data Mode:
- Visit Mobile Service > Mobile Data Option.
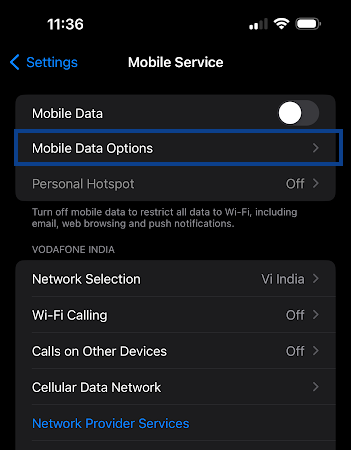
- Tap on Data Mode.
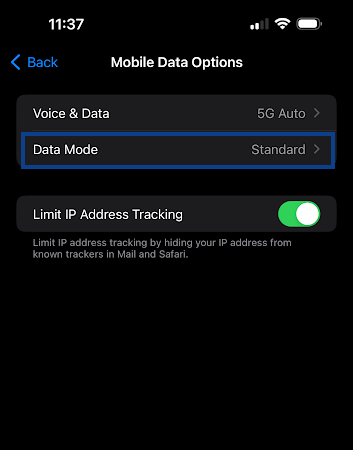
- Turn off Low Data Mode.
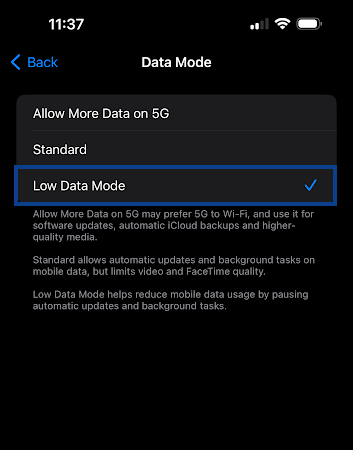
- Visit Mobile Service > Mobile Data Option.
After that, retry the software installation to see if Apple’s update request error has been resolved.
Force Exit the Settings App
Sometimes the Settings app contains bugs that prevent your iPhone from updating smoothly. To resolve this issue, try force-closing and then reopening the Settings app as follows:
- Exit from the Settings app and open the App Switcher on your iPhone by swiping up from the bottom or double-tapping on the home screen.

- Locate the Settings app and swipe up to force stop it.
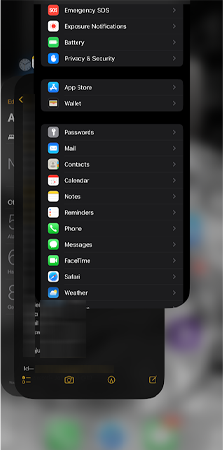
- Now, you can reopen it to check if the issue is resolved.

If the method of force quitting the Settings app doesn’t eliminate the error, you should try to reboot the iPhone.
Also Read: iPhone Unable To Activate? Try These 9 Troubleshooting Ways to Fix the Error
Restart the iPhone
Most of the software glitches can easily be resolved by rebooting or restarting your iPhone. It restarts your device and removes any temporary files or processes that may be causing problems during the software update. To restart your iPhone version 11 or later, follow the steps given below:
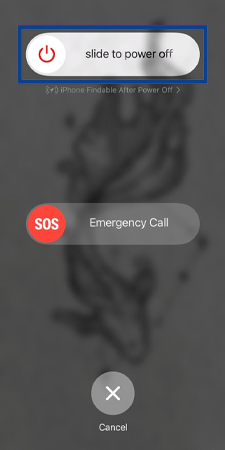
- First, press and hold the Volume Up or Down button and the side button together until the power-off slide appears on the screen.
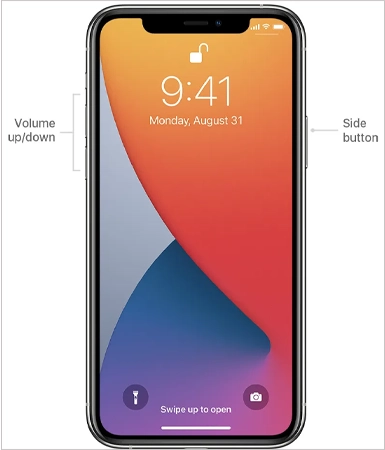
- Drag the slider to the right and wait for about 30 seconds to get your device turned off.
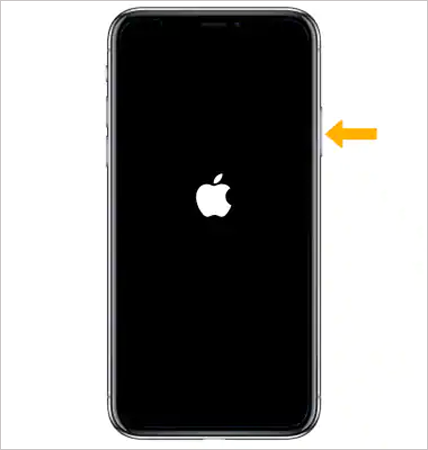
- Finally, press and hold the side button until the Apple logo appears.
Note: If using an iPhone 6, 7, 8, SE (1st, 2nd, or 3rd generation), 5, or previous versions, you can reboot the device only by pressing the sleep/wake button.
Free Up Some Space
If your iPhone does not have enough storage space, the iOS software update download process may be interrupted. There should be at least 8 GB free space in the device to perform regular functions smoothly and install the firmware file as well. You can check the iPhone storage by following the given steps:
- Open Settings on your iPhone and tap on General.
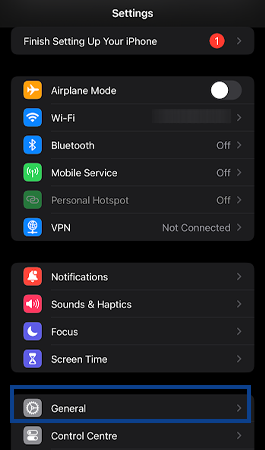
- Head to iPhone Storage.
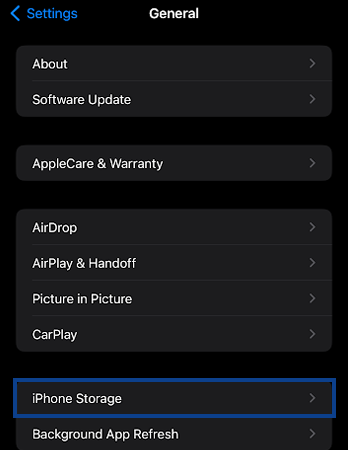
- Now, check the Storage Bar to know the total available storage in the device.
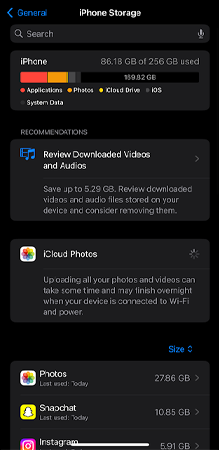
If your iPhone is running out of storage, you can clear the cache files, large attachments, and message history, uninstall useless apps, and delete unnecessary junk.
Also Read: How To Organize Photos On iPhone Without Duplicates?
Delete the Software Update and Reinstall It
If your iPhone is still stuck on the update requested, even after managing space and restarting the device, there is the possibility you have installed the corrupted firmware file. In this case, you can try to delete the installed update and then reinstall it from the scratch as follows:
- Open iPhone Settings > General.

- Head to the iPhone Storage section.

- Locate the downloaded iOS update there and tap on it.
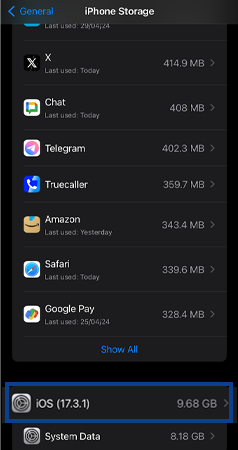
- Then, select Delete Update.
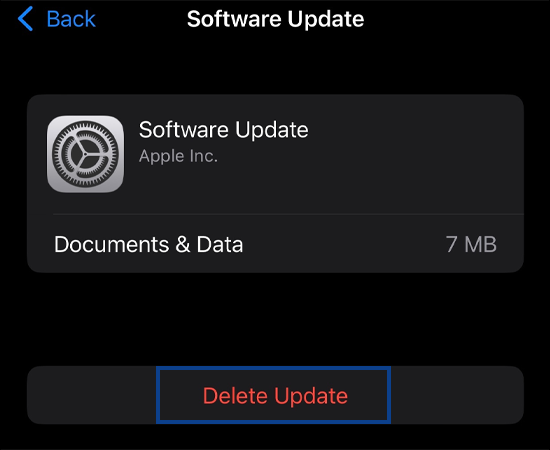
- One more time, tap on Delete Update.
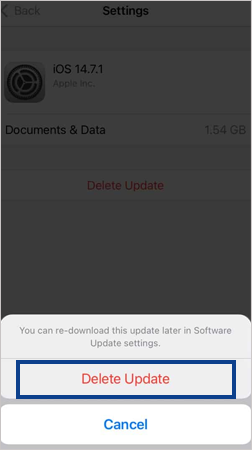
- After that, you can update your iPhone by reinstalling the Software Update.
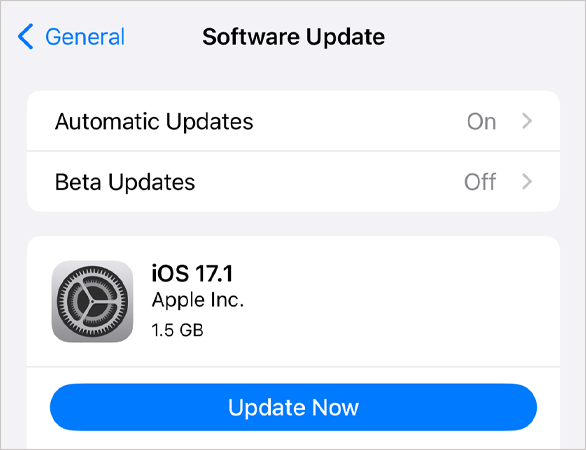
If you can not find the software update in iPhone Storage, it might not have been installed, so there is nothing to delete. Then you can try the other methods discussed below.
Download the Update Through iTunes
If you cannot download the Apple update on your iPhone, you can try it with your computer’s iTunes or Finder app. This way, you don’t have to visit the software update on your iPhone and can directly get it by downloading it on the computer.
- First, install and launch the iTunes or Finder app on your computer, then connect your iPhone and computer with an Apple USB.
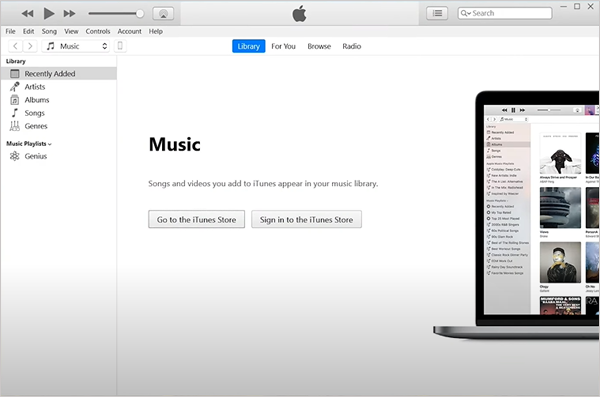
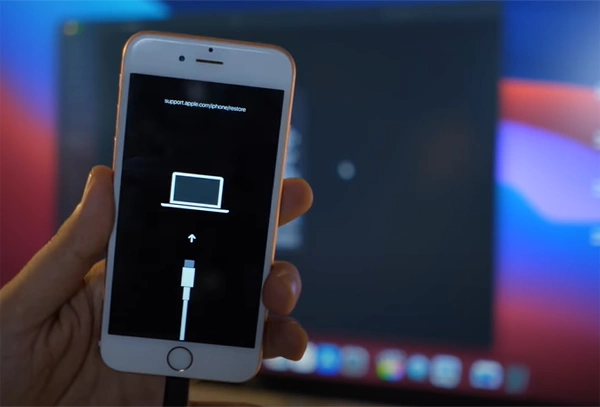
- Now, force restart your iPhone to turn on the recovery mode.
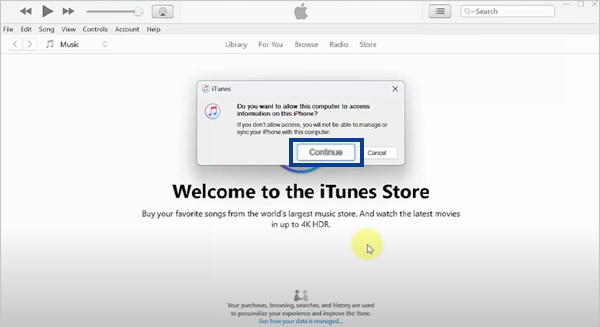
- iTunes will request permission to allow this computer to access information on the iPhone. Select the Continue option.
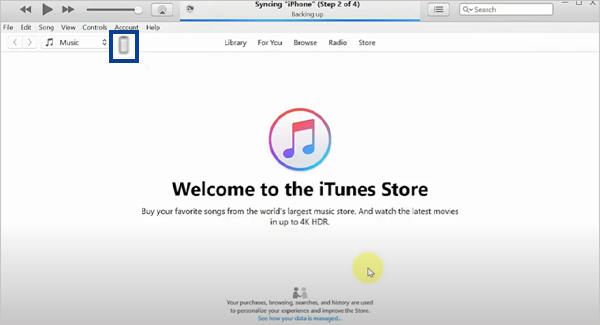
- Next, click on the small phone icon from the top left corner of the page.
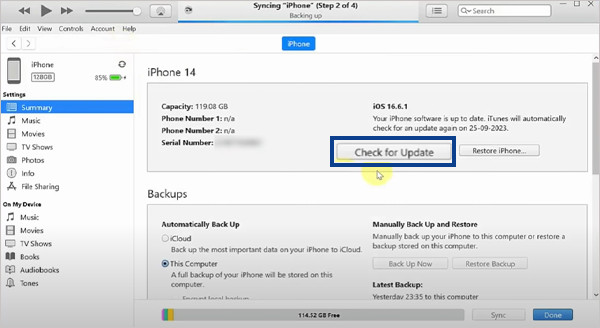
- After that, click on the Check for Update button.
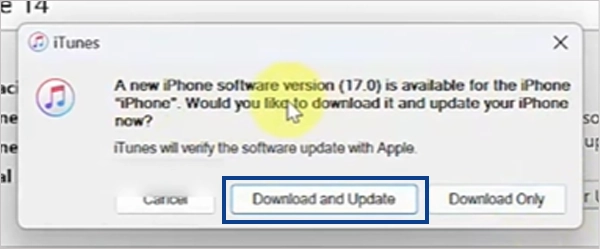
- Select Download and Update from the appeared dialogue box.
- Then, click on Next.
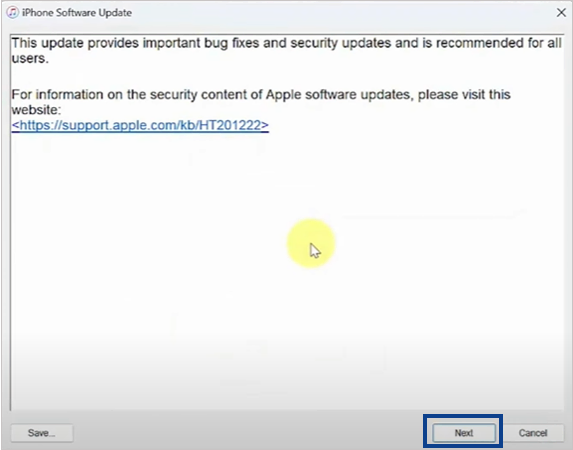
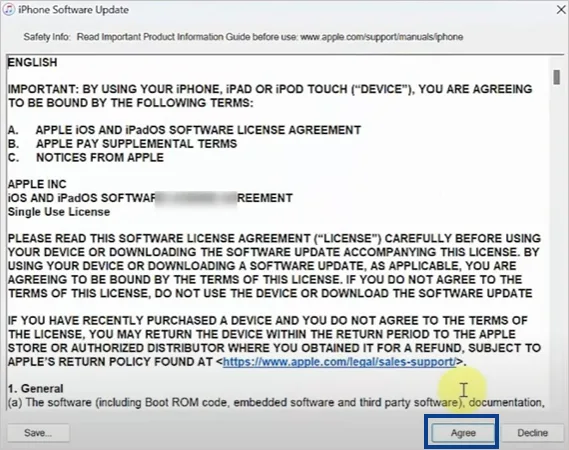
- Select Agree on the next screen, and the downloading process will begin.
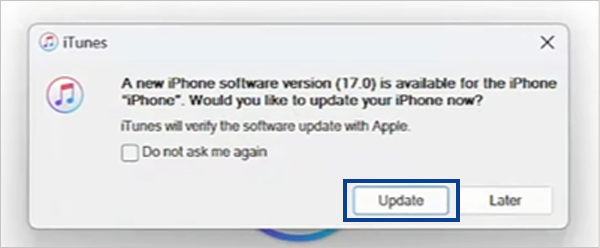
- Now, it’s time to update the software on your iPhone. For this, reconnect the iPhone with a PC and select Update. This may take a few minutes.
- Finally, a notification will pop up on your screen stating your iPhone has been updated.
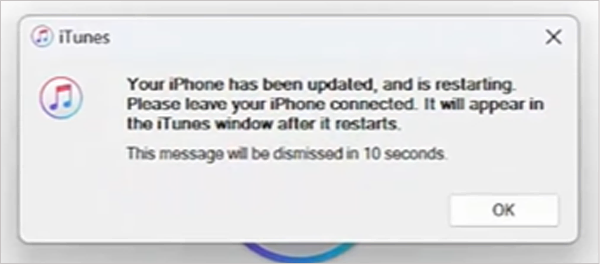
Finally, go to your iPhone, accept the update, and then check for software updates in the settings.
Also Read: How to Update Safari on Mac, iPad, and iPhone in 2023? — [Explained]
Reset Network Settings
Resetting network settings to default can help to fix any network error. This will remove all previously used networks and VPN settings. iPhone provides you with the feature to reset network settings, which you can select as follows.
- First, head to Settings > General.

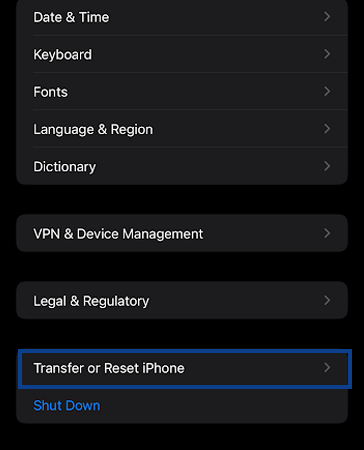
- Now, tap on Transfer or Reset iPhone.
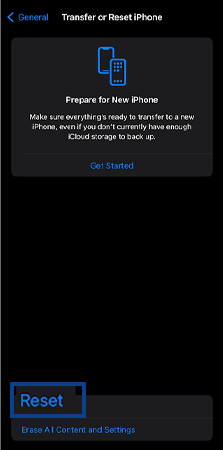
- Then, select the Reset option from the bottom of the page.
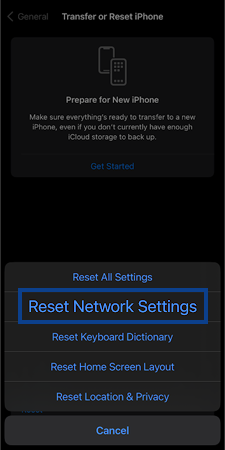
- Next, hit the Reset Network Settings from the available options.
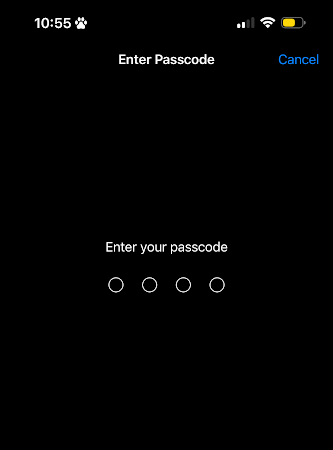
- After that, enter the iPhone passcode to proceed further.
- Lastly, select the Reset Network Settings option and the network reset process will finish within a few seconds.
If this doesn’t work, you can also reset all settings by going to Settings > General > Transfer Or Reset iPhone > Reset > Reset All Settings. However, before opting for this solution, don’t forget your iCloud login for data backup & sync so that you can restore it once the resetting is done.
Conclusion
We learned how to fix the problem when the iPhone says update requested. To avoid similar errors in the future, you can enable automatic iOS update downloads in Settings.
If none of the aforementioned measures work, you can try resetting your iPhone or contacting Apple Support.
We hope this article helped you get the latest iOS software and a smooth experience!
Read Next: How to Make Keyboard Bigger on iPhone? 7 Ways to Make iPhone Keyboard Bigger in No Time
FAQs
Ans: It means your iPhone device is requesting the server for an update to get a firmware download.
Ans: This could be because the iOS update file that you downloaded is corrupted. In this case, you can delete the current file and re-download the update.
Ans: If the internet connection, device storage, and all other factors are fine, the request to update the iOS 16/17 should take less than 5 minutes.
Ans: If your iPhone is stuck updating, try closing the Settings app, restarting it, freeing up some space, resetting network settings, etc.
Sources:
