How to Make a PDF on iPhone? 4 Ways to Convert Photos or Docs into PDF
The Portable Document Format (PDF) files are a widely used file format for official works. They are compatible with all devices and, hence are easy to share.
The iPhone has an integrated feature that allows you to convert any file, photo, note, or webpage into a PDF. However, many users still don’t know how to make a PDF on iPhone. If you are among them, here is a detailed solution for you.
In this article, we will learn the process of converting iPhone images to PDFs. We will use the built-in Print or Markup feature, as well as third-party apps.
How to Create a PDF on iPhone Using the Files App?
In the Files app of your iPhone, you can get all the downloads, photos, documents, and other files. The app allows you to create a PDF with the help of the Print option. The steps are outlined below:
- First, navigate to the Files on your iPhone and look for the file you want to save as a PDF.
- Now, long press on it and select the Share option.
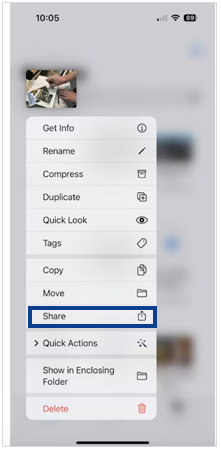
- Then, scroll down and tap on Print.
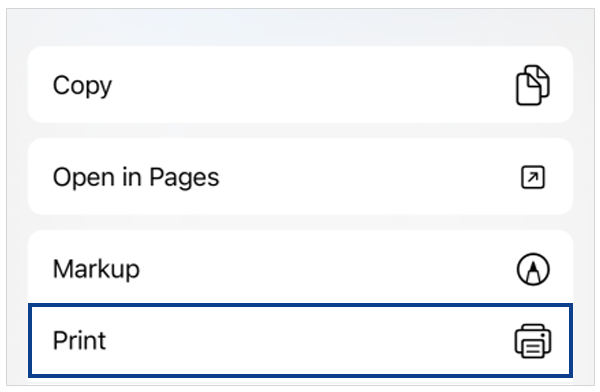
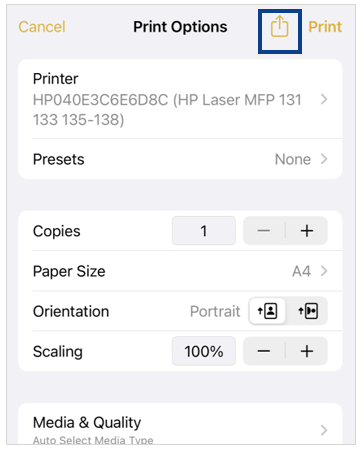
- Next, hit the share icon at the screen’s top right corner.
- Click on Save to Files.
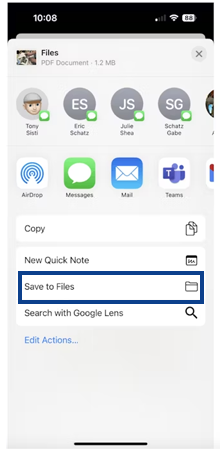
- Finally, select the Save button.
Now, you can see the photo or document that you selected in the original as well as in PDF format in the Files.
How to Make a PDF on iPhone for Webpages?
Do you want to save an article or a blog from a website in PDF format? Yes, it’s possible! You can simply convert it into a PDF and save it to the Files of your iPhone. Here are the steps that you need to follow for this:
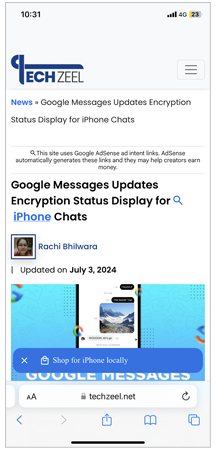
- First, open the webpage you want to convert into a PDF and tap on the Share button that is usually available at the bottom.
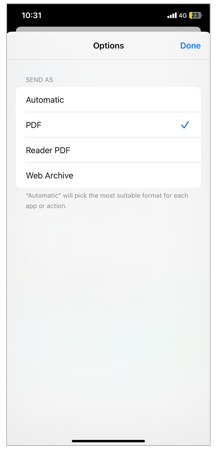
- Now, tap on Options and choose the PDF File option.
- Then, your file has been converted into a PDF. You can preview it, make changes, add annotations, or sign it using the Markup tools.
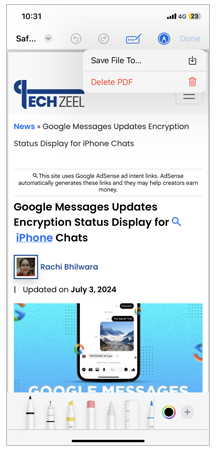
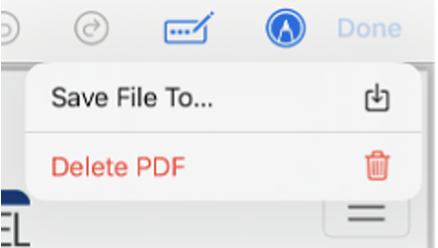
- Finally, tap on Save File To…, select the file location and name, and save it.
Apart from saving to the device, you can directly share this PDF through mail or any other app.
How to Make PDF with iPhone Camera in Notes?
You can use the Notes app to convert your document into a PDF file and save it to your device or iCloud. You can do it by following the given steps:
- Open the Notes app on your iPhone and create a new Note.
- Tap on the Camera icon from the bottom bar and select Scan Documents from the dialogue box.
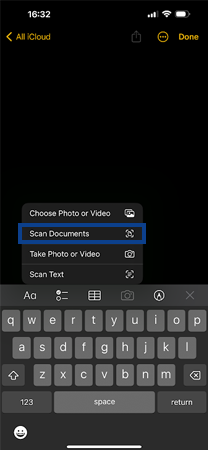
- Now, it will start scanning the document by launching the camera interface. Adjust the frame over the document, and the app will automatically capture it.
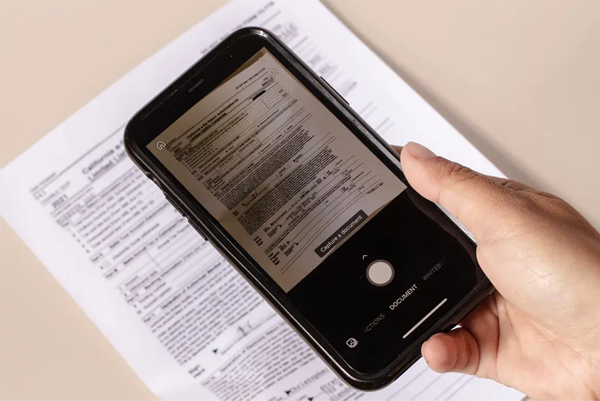
- Finally, when you are satisfied with the scanning, tap on the Save button.
Note: You can even opt for Manual scanning by switching from Auto to Manual.
How to Use Microsoft Office Suite for Making PDFs on iPhone?
If you frequently work with Microsoft Office documents, you can also install Microsoft Office suite apps like Word, Excel, or PowerPoint on your iPhone to save your files as PDFs. Follow the simple steps outlined below:
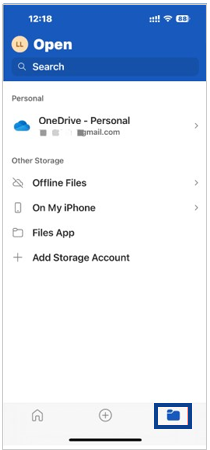
- Open the existing Word document, Excel workbook, or PowerPoint presentation and tap on the File icon from the bottom right corner of the screen.
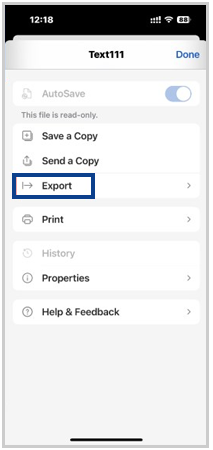
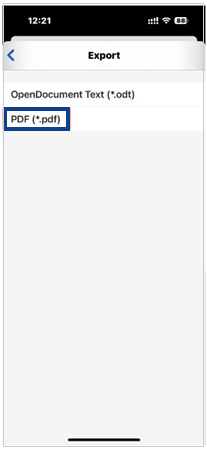
- Next, select the Export option.
- Now, select the PDF (*.pdf) option.
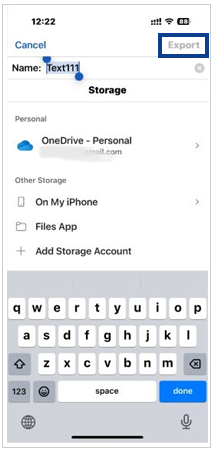
- Enter an appropriate name for the file, select the location, and hit the Export button to convert the document into a PDF.
The document, workbook, or presentation is now ready to share in PDF format.
Creating PDFs on iPhone with Other Third-Party Apps
There are several scanning apps available on the App Store that allow you to convert scanned documents into PDFs, including PDFelement, Scannable Evernote, PDF Export Lite, PDF Converter Pro, iConverter – PDF, Ringtone Converter, and others. Here is how can you use these apps:
- First, install a good scanning app from the App Store on your iPhone.
- Open it and set your camera over the document. The app will detect the edges and text and capture the image. You can change the frame if necessary.
- Once, you have captured all the pages, the app will provide options to crop, edit, rotate, or apply filters. You can make the necessary adjustments.
Finally, you can save the scanned document as a PDF file on the device.
Conclusion
We have covered everything necessary to learn how to make a PDF on an iPhone by using various methods such as share, markup, notes, MS Office Suite, and other apps. This allows you to keep your documents or photos in their original quality while easily sharing them with others at high resolution and compatibility.
We hope you are now familiar with the process of creating a PDF on your iPhone and can share or use it for personal or official purposes!
Read Next: Are You Worried About Hyperlinks Not Working in PDF? Get 5 Workable Solutions Here!
FAQs
Ans: Go to Files > Open the photo or doc > Tap on Share > Print > Share icon > Save to Files > Save.
Ans: Navigate to the Files app > Open the document > Tap on the share icon from the bottom left corner > Share the PDF via email, AirDrop, Messages, or other ways.
Ans: This could be because you are trying to send the PDF to a non-iOS device, which is not supported by iMessage. In such a scenario, you can send it through MMS instead.
Sources:
