Looking to Edit Videos on Mac? 3 Apps You Can Use

Do you own a MacBook and want to edit videos on it, but don’t know any software? Fret not, as there are many useful apps through which you can edit videos on your Mac. We have come up with 4 useful video editing apps, so what are you waiting for?
After knowing about the apps, you can find a YouTube tutorial and learn how to edit videos by performing a split screen on MacBook and doing the steps as shown.
This guide will discuss a built-in video editing app on MacBook and 2 professional-level video editing apps for MacBook. You just have to learn, open the software, and use its tools.
Let’s get started!
2 Built-In Video Editing App
There were 2 built-in video editing apps on the MacBook, but after the discontinuation of the QuickTime services, we were left with only iMovie.
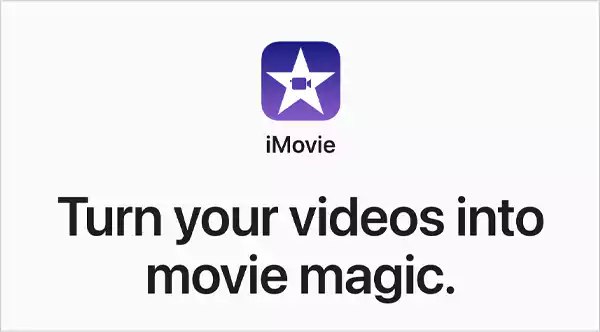
iMovie is a dedicated free video editing app for MacBook. Its ability to quickly generate cinematic movie trailers made it relevant since its release in 1999.
The system requirements for using iMovie are:-
- macOS 13.5 or later versions
- 4 GB RAM
- 3.5 GB of available disk space.
The following are the features of iMovie:-
- Uploading videos through Airdrop and email.
- 29 Hollywood trailer templates with high graphics
- Editing 4k videos from iPhone, GoPro, and other Ultra HD cameras on compatible Macs.
- Supports 1080p HD at 60 FPS.
- Slow down and speed up the video with slow motion and fast-forward effects.
- Improve the visuals and audio of your video with ‘One-Click Enhance’.
- You can use green-screen controls to change the background of the video and soften the added effects.
- Track and determine the distance of the objects from the camera using ‘People Detection’.
iMovie can be a great choice if you are a beginner and looking for video editing software for casual editing. You can also log in to iCloud to organize the video files into folders.
Although it is the best choice for beginners due to its easy interface, it could be a little underwhelming for professional editing. Therefore, we have come up with a few other free MacBook-supportive video editing apps.
Developed by Apple itself, QuickTime Player is a built-in video editing software in macOS. Its interactive and user-friendly interface makes it suitable for beginners.
The following are the features of QuickTime Player:-
- Creating videos by choosing a camera and microphone for recording.
- Trimming big videos into smaller clips for editing.
- Rearranging clips in video.
The lack of elements like sound editing, color correction, and grading makes it suitable for only basic-level editing.
2 Professional Video Editing Apps For Mac
iMovie is unable to provide features like equalization and noise reduction, crucial elements of professional editing software. So, we have come up with 2 free professional video editing software for MacBook.
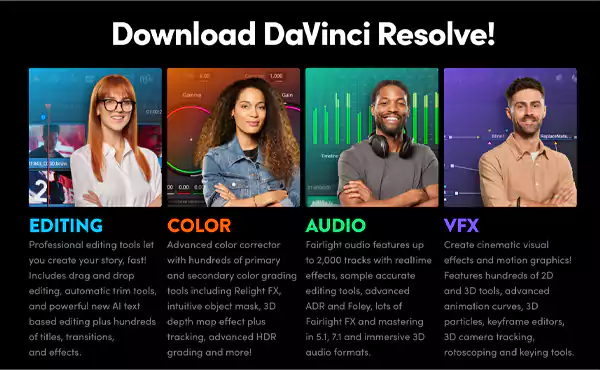
DaVinci Resolve is a software that combines video editing, color grading, motion graphics, audio post-production, and visual effects in one place. Due to the availability of various features, it has been used in the film industry for decades.
The system requirements for using DaVinci Resolve are:-
- macOS 11 Big Sur
- 8 GB of system memory and 16 GB when using Fusion
- Blackmagic Design Desktop Video version 12.0 or later
- Integrated GPU or discrete GPU with at least 2 GB of VRAM.
- GPU which supports Metal or OpenCL 1.2.
Now, let’s see what are some of its unique features:-
- Track and create masks around objects to do color grading using Magic Mask.
- Use ‘Surface Tracker’ in ‘Fusion’ to quickly track objects and surfaces.
- Create a slow-motion and fast-motion video with the Speed Warp feature.
- Use ‘Face Refinement’ for tracking and recognizing faces in the video footage.
- Reframe the aspect ratio of your footage with Smart Reframe.
- Use ‘Voice Isolation’ to remove background sounds from the audio of your footage.
What’s unique about DaVinci Resolve Studio? It supports up to 120FPS, 32K resolution, and advanced HDR delivery.
DaVinci is not completely free. Its free version comes with some limitations like being unable to export video in 60FPS or 4k. Its paid version is called DaVinci Resolve Studio and costs $295.

Final Cut Pro is a professional video editing application for MacBook and iPad. Its Mac version was initially released on June 21, 2011.
System requirements for the software:-
- macOS 13.5 or later
- 8 GB of RAM (16 GB for third-party plugins and effects)
- Intel-based Mac computers only
- Availability of 5.8 GB of disk space
- Some features require a Mac with Apple Silicon. Some features require internet access; fees may apply. A Blu-ray recorder is required for burning Blu-ray discs.
The following are the features of Final Cut Pro:-
- It displays the number of times a clip or audio is used while editing the footage.
- Its Multicam feature allows a user to sync up to 64 camera angles and displays up to 16 different camera angles of a video.
- Magnetic Timeline allows users to move files in the timeline without sync problems.
- Use its built-in chroma key to change the background of video clips.
- Use Motion Graphics to create 2D, 3D, and 360° titles and transitions.
Remember, Final Cut Pro is a paid software that costs $299.99. However, you can use its free trial for 90 days.
Conclusion
When it comes to choosing the best video editing software out of these, it’s obvious that Final Cut Pro and DaVinci Resolve are superior as they are paid.
However, the free features of iMovie like supporting 4K resolution, 1080p at 60FPS, and free high-resolution trailer templates are also appealing to use. Thus, it completely depends on your preference and budget to select the right one for you.
Read Next: How to Fix Touch Bar on MacBook Pro Using 10 Unique Methods
FAQs
Ans: Yes, the MacBook has a built-in video editing application called iMovie for casual editing like adding a photo, transition, and audio to your video clip.
Ans: No, Final Cut Pro is specially designed for MacBook and iPad. You can’t use it on Windows. However, you can go with other software like Adobe Premium Pro, After Effects, and DaVinci Resolve.
Ans: DaVinci Resolve (free) and DaVinci Studio (paid) are pretty similar, except DaVinci Resolve supports 60FPS with 4K resolution, whereas DaVinci Studio supports up to 120FPS with 32K resolution.
Ans: Yes, the $299.99 is a one-time charge for using Final Cut Pro. You don’t need to pay any monthly subscription after the one-time payment.
Sources –