Your phone includes many inbuilt GIFs and emojis to describe your feelings and mood swings. But all you are striving for is a personal touch. Converting the live photos you have taken that best describe a GIF’s mood can work brilliantly.
But how?
With that in mind, we have quoted the procedure on how to make a GIF on an iPhone and create some visually appealing animations for future reference.
4 Different Ways to Create GIFs on an iPhone
There are 4 different ways to create GIFs on an iPhone using the inbuilt features and some apps. So immediately, clear the system data on the iPhone to make space for thousands of GIFs
Let’s discuss the 4 methods in detail.
Create GIFs with Shortcuts on iPhone
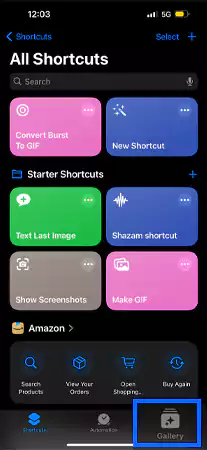
Download and install the shortcut app on your iPhones.
In the bottom right corner, tap on the Gallery.
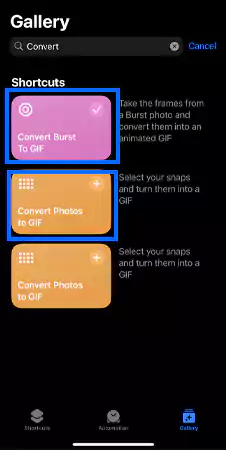
Search Convert Burst to GIF and Convert Photos to GIF and add them for the further process.
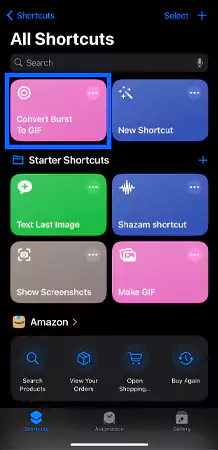
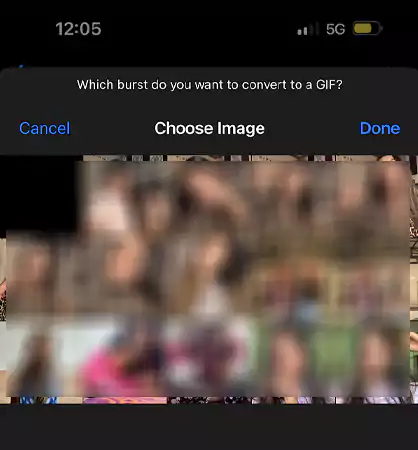
For instance, run the shortcut, Convert burst to GIF.
Select the image from the section, and wait for a while.
Tap on Done to create your personal GIF.
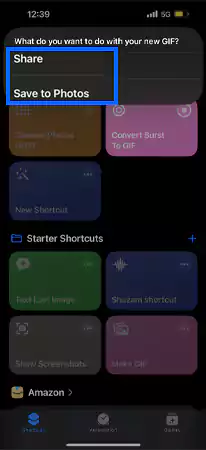
In the end, you will be prompted to either Share the GIF or Save to Photos. Select one according to your preferences.
Save the Live Photos as GIF’s
As explained above, the Live photos capture both sides of the scene. But first, you need to understand the step-by-step instructions to execute the whole process effortlessly.
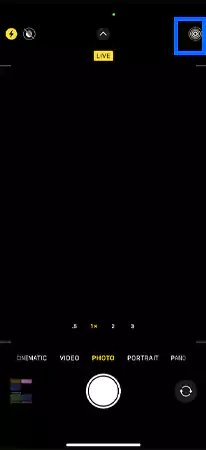
Start with capturing the live photos. To capture, press the concentric circle at the top of the camera app to turn on the Live option.
After that, open the Gallery.
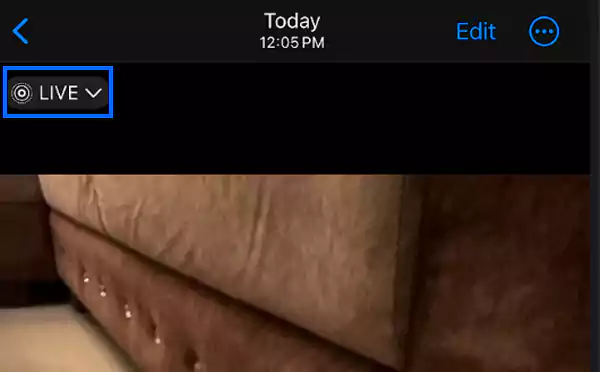
Open the Live Photo, you want to convert it into a GIF from the Live Photo section.
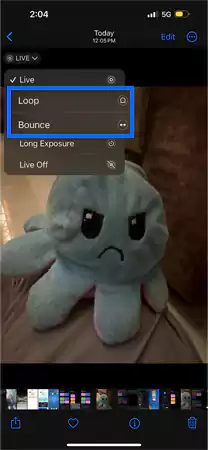
On the top left, you will see an icon saying live.
Tap on Live and select Loop or Bounce to give the animated effect to the picture.
Now send it as a GIF in your email and messages.
Make a GIF on iPhone Using the Keynote
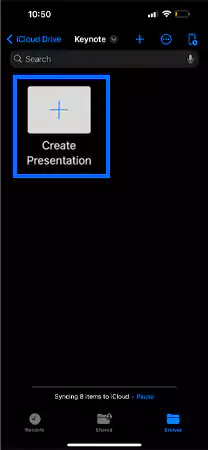
Download and install the keynote app on your iPhone.
Launch the app and tap on Create Presentation.
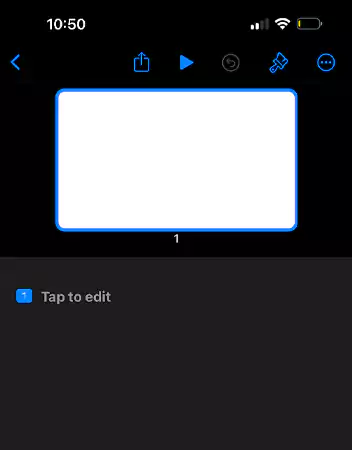
Explore the in-built features and add text and pictures to make an animated GIF.
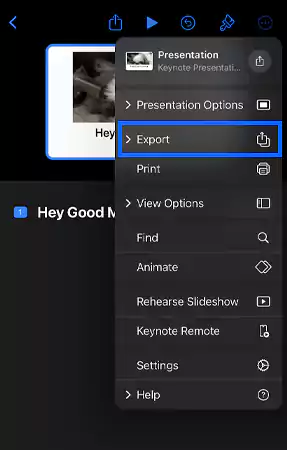
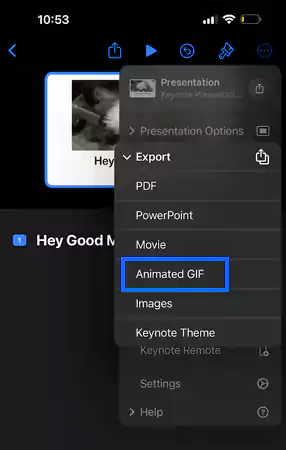
Tap on the More icon (three horizontal lines) in the top right corner.
Select Export from the list of the options.
Moving ahead, select Animated GIF.
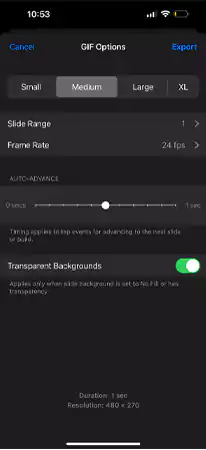
Adjust the Slide Range and Frame Rate settings.
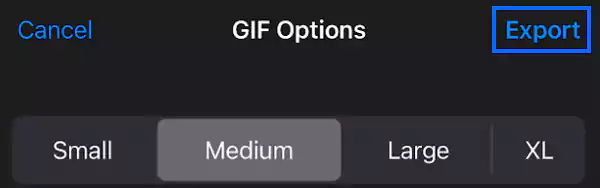
Tap on Export.
Hit the Share option.
Decide to either Save Image or Share it directly with the different apps.
Using the Third-party App
The last but not least method to create a GIF is using third-party apps and platforms. One of the famous software is GIPHY. Check out the instructions mentioned below:
Launch the app and tap on the Create button in the top right corner.
Allow camera access by tapping on OK.
Capture some stills and select the GIF tab from the bottom of your screen.
On the other hand, tap on the photos icon and select the content from the camera roll.
Besides this, you can also rely on third-party apps like Giphy to create. But consider using it at your own risk, as it can be a huge threat to your phone and data.
Tips for Creating Potential Eye-Catching Animated GIFs
Whether you want to create GIFs for social media, brand/business promotions or personal conversations, adhering to the notable tips and tricks can drive the best results.
The prime step towards creating animated GIFs is sourcing superior quality material that is high-resolution images and live photos.
The short and crisp animated GIFs add more meaning and deliver the punch effortlessly. The time preferred should be 3 to 6 seconds long.
The GIF focused on a single action and message are more impactful and immediately recognisable.
Pay attention to creating the text wisely. Choose the correct use of words, lines, font size, color and placement wisely.
The large file size can reduce the loading size, troubling the user experience. For that, consider compressing the file size without compromising the overall quality.
Hence, there is no hard and fast rule to follow while creating the GIF, instead, it completely depends on your creativity and imagination.
Conclusion
Leveraging the iPhone’s inbuilt apps and features, you can create the most captivating GIFs at your fingertips to express any feeling and mood.
So whether you want to spark the conversation with funny GIFs with your pal, or looking for effective marketing for a product or brand, the methods on how to make a GIF on iPhone can do wonders for all events.
FAQs
Ans: GIF Maker, GIPHY, Video to GIF and more apps you can use to make a GIF on iPhone.
Ans: You can add the text in GIF using the inbuilt features and third-party apps.
Ans: There are no such restrictions on the maximum length of the GIF. But it is suggested that uploading a GIF at most 6 seconds is considered best.