Managing or changing an Apple ID can seem confusing sometimes, but it’s a straightforward process by which you can easily access the Apple services authentically.
Whether you have decided to switch to a new Apple ID, or no longer use the email address or mobile number linked to the existing Apple account, updating your device with the right steps is important.
In this article, we will give you simplified instructions for your query “How to change Apple ID on iPhone”, by which you can update your Apple ID smoothly. Let’s get started!
An Apple ID can be referred to as an account that gives you access to various Apple services such as App Store, iCloud, FaceTime, iMessage, and many more.
Your Apple ID can be linked with an Apple email address such as @mac.com, @me.com, or @icloud.com. Also, you can create one with your email address, for example, yourname@gmail.com or any further third-party email address.
Moreover, the ID contains your personal information, through which you can also purchase additional Apple services like premium apps, books, music & films, and much more authentically.
Here, let’s see the easy-to-follow steps to locate your Apple ID on your iPhone.
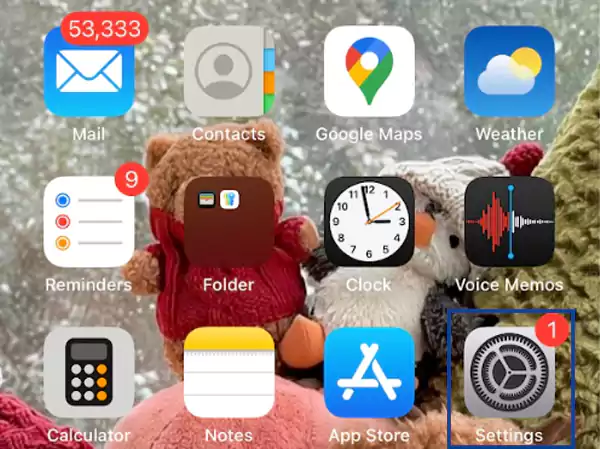
1. Locate your Apple ID on your iPhone
To locate your Apple ID, adhere to the steps listed below.
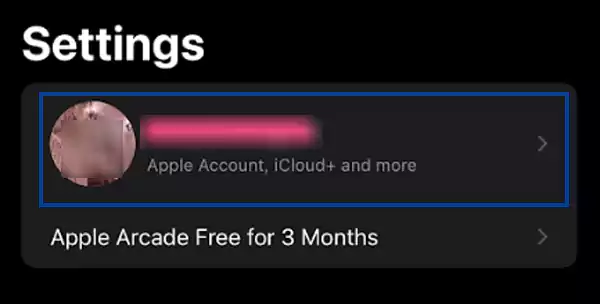
Look for the Settings app on your device.
Tap on Your Name.
Locate your Apple ID details, listed there.
Thus, by following the above-mentioned steps, you can easily locate your Apple ID on your iPhone.
How to Change Apple ID on iPhone?
Several possibilities may arise in a situation that makes you stressed and think, “How do I change my Apple ID?”. In that case, do not worry, here we have mentioned how you can easily modify Apple ID on your device.
1. Instructions to Sign Out from your Old Apple ID
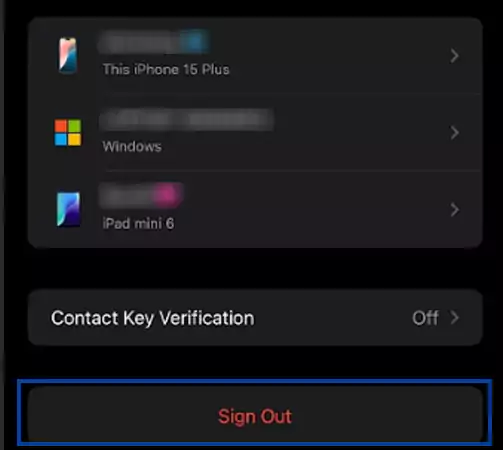
Look for the Settings app on your device.
Tap on Your Name.
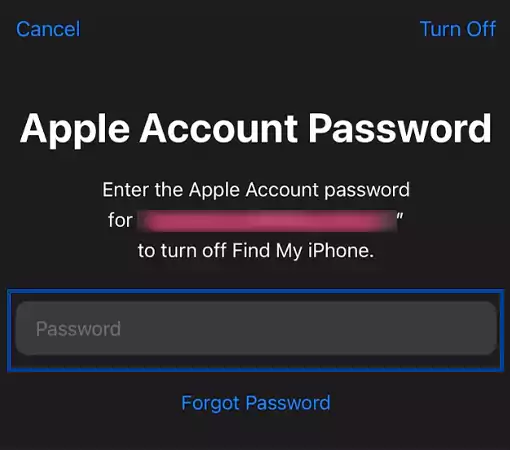
Scroll down to the bottom and tap Sign Out.
Enter your Apple Account Password.
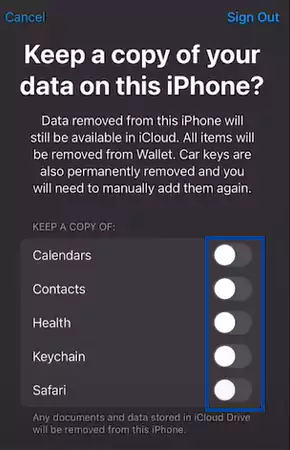
Enable the toggles of the data you want to keep secured.
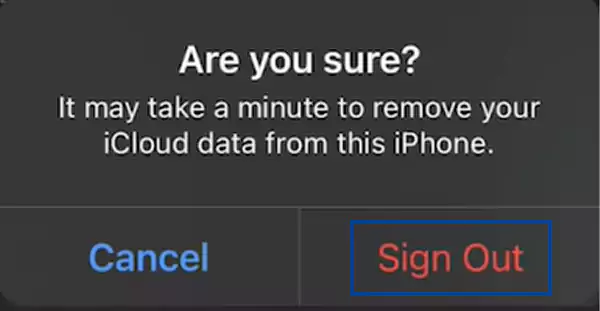
Tap Sign Out.
To confirm, tap Sign Out again.
As a result, you will be signed out from your old Apple ID.
2. Create a New Apple ID on the iPhone
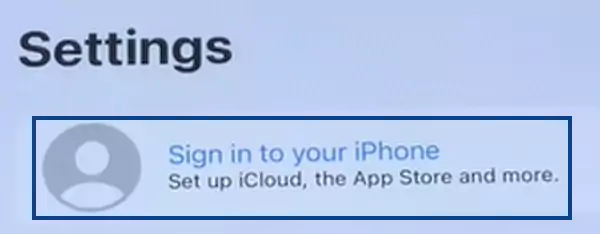
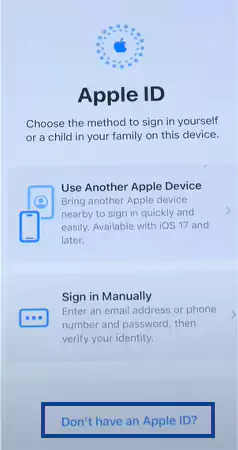
Launch the Settings app on your device.
Tap on Sign in to your iPhone.
Tap on Don’t have an Apple ID? option.
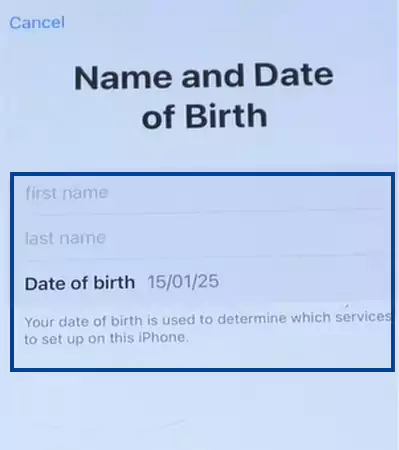
Enter your first name, last name, and Date of birth.
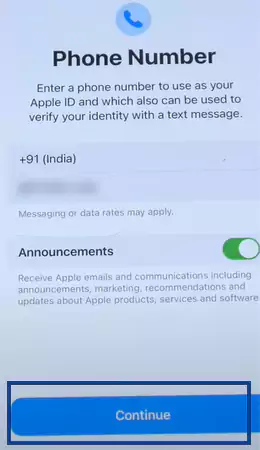
Choose any one option from two and tap on it, according to your preference.
For example, here we are selecting the use phone number option.
Enter your New Phone Number.
Tap on Continue.
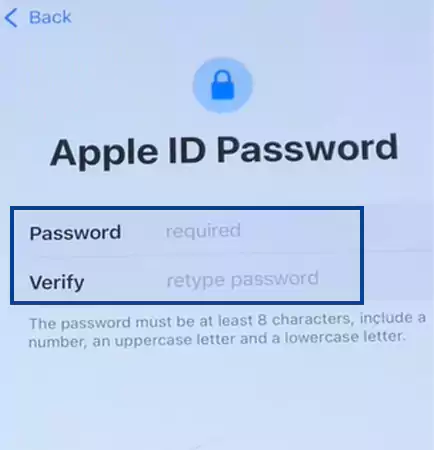
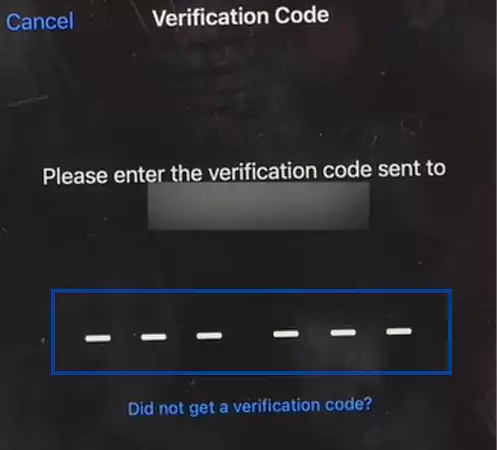
Enter a Verification Code that has been sent to your mobile number.
Create an Apple ID Password and verify it by re-entering it.
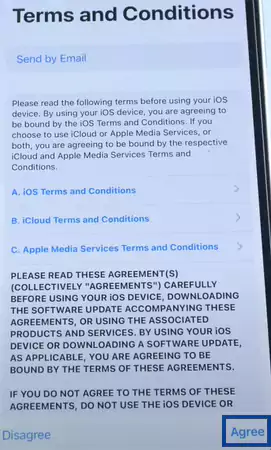
Tap on Agree, in the terms and conditions section.
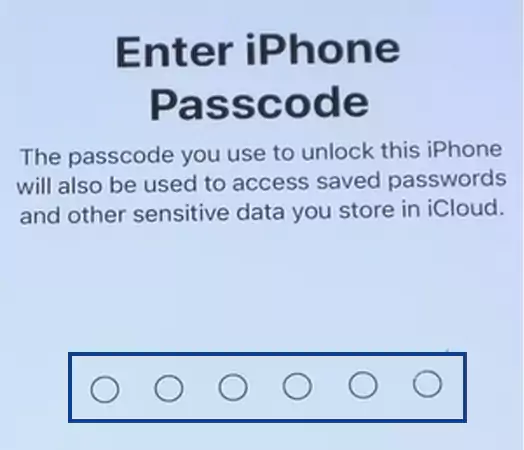
Enter the iPhone passcode.
As a result, you can see the new Apple ID has been created in your device.
However, by using these two simple steps, you can easily change your Apple ID account and start a fresh journey with any Apple device.
Note: You can also create a new Apple Account (ID) by visiting the official website of Apple ➡➡ appleid.apple.com
Things to Adhere After Changing the Apple ID on iPhone
After changing your Apple ID, you must do numerous tasks on your device. Here, we have highlighted the major one for you, have a look:
Sign Out of Old Apple ID and Log In With New One: After adding the new Apple ID, firstly you must sign out from the previous one across all the platforms such as iCloud, iTunes, and App Store and ultimately log in to the aforesaid platforms with the new one.
Re-purchase Content: After done with the changes to your Apple ID, you won’t be able to access the purchased content, for instance, app store applications, music & films from iTunes, books from Apple Books, and subscriptions to several Apple services. Thus, you have to install & purchase them again.
Apple Pay: Once the changes are implemented, the cards on Apple Pay will remain same as earlier on your device, but still you have to add them again along with your information utilizing the new Apple ID.
Therefore, these are some important tasks you must do after applying the changes.
If you do not want to change the entire Apple Account and just want to manage it by the recent updates. For example, add an alternative email address or mobile number as a secondary one in your Apple ID, then adhere to the mentioned below steps attentively.
1. Add a New Email Address to your Apple ID
Before starting the process, remember that you cannot use an email address that has already been activated in an additional Apple ID. Accordingly, follow the steps listed below to add an alternative email address to your Apple ID.
Locate the Settings app on your device.
Tap on Your Name.
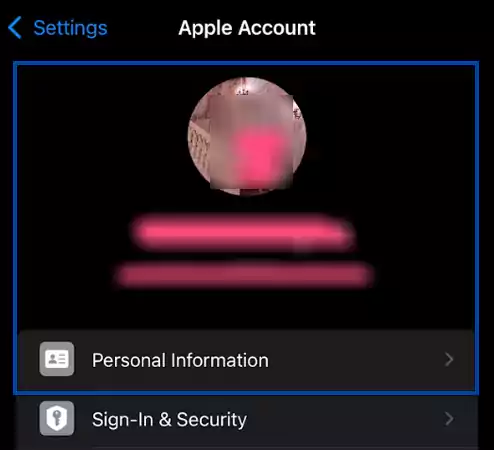
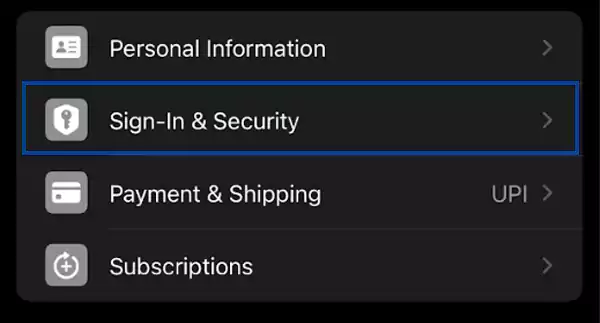
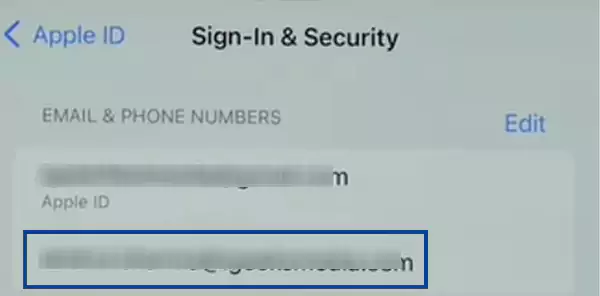
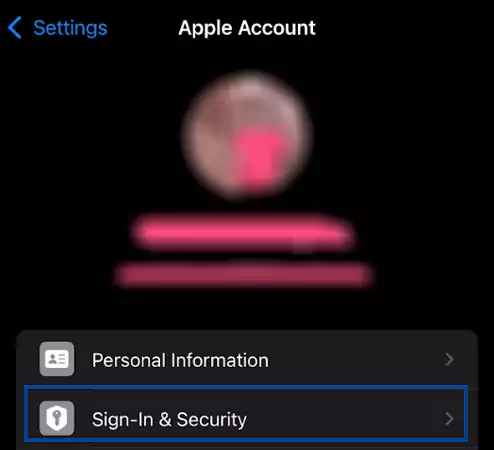
Head over to Sign-In & Security.
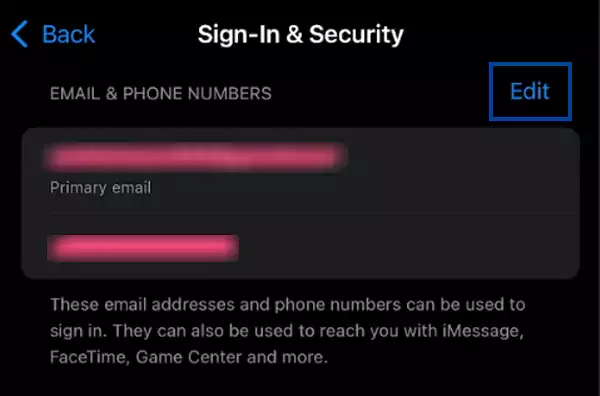
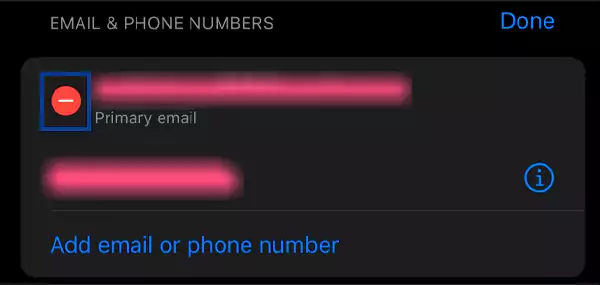
Tap the Edit option, next to your email & phone numbers.
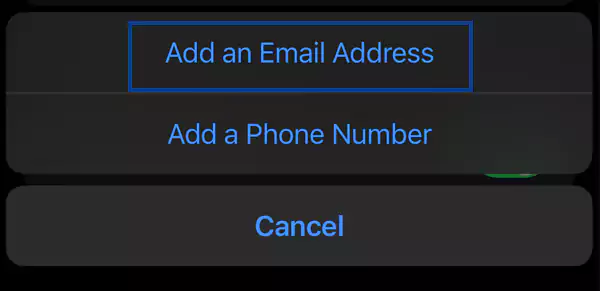
Tap on Add email or phone number.
Tap on Add an Email Address.
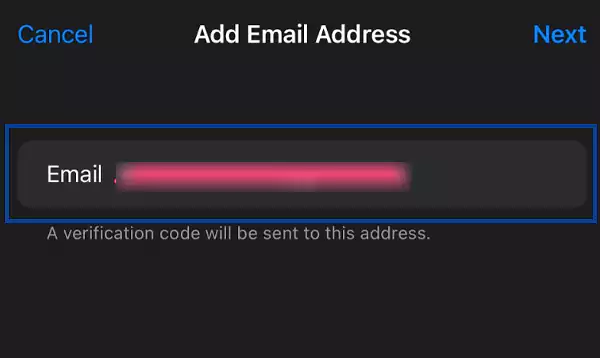
Enter the New Email Address.
Tap Next.
Enter the Verification Code that has been sent to your new email address.
As a result, an additional email address has been added to your Apple ID.
However, adhering to these steps will add a secondary email address to your Apple ID, there will be no change in the primary email address.
2. Add a New Mobile Number to your Apple ID
Make sure the mobile number is not used with the other Apple devices, and also it should be in active mode to complete the verification process.
Open the Settings app on your device.
Tap Your Name.
Locate Sign-In & Security.
Tap Edit, at the right corner.
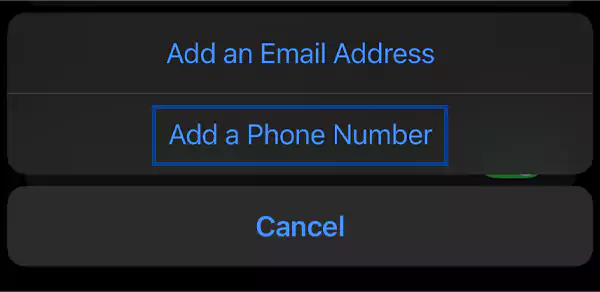
Tap on Add email or phone number.
Tap on Add a Phone Number.
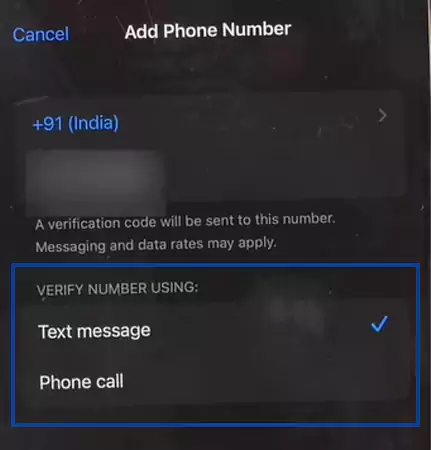
After adding the new mobile number, select the method of verifying the new number as you like.
For example, here we are selecting the text message option.
Tap on Continue.
Enter the Verification Code that has been sent to the number you are adding. Also, if you have chosen the phone call option then you don’t have to answer the call, verification will be done automatically.
As a result, you can see your new mobile number has been added to your Apple ID.
However, the listed above is a simple and effective method to add a new email address or mobile number to your Apple ID on your iPhone.
How to Remove the Primary Email Address and Phone Number from Apple ID on iPhone?
To remove the primary email address or phone number, it will only take 5 to 6 steps. But the notable thing here is that after you remove them, the secondary one will not be considered as the primary email address and mobile number if any are added.
Thus, here are the easy-to-follow steps, take a look.
1. Remove an Email Address from your Apple ID on an iPhone
Look for the gear-like icon on your iPhone.
Tap on Your Name.
Tap Sign-In & Security.
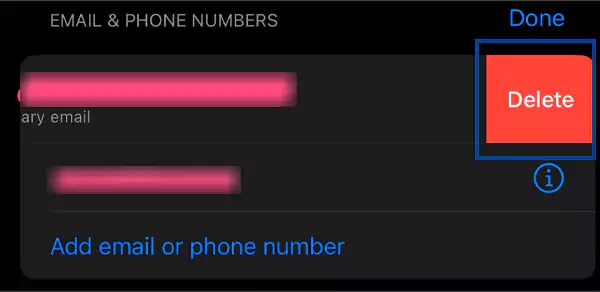
Tap on Edit.
Tap on a red circle, located on the left side of your primary email address.
Tap on Delete.
Follow the instructions carefully given on the screen.
As a result, the primary email address will be removed.
Therefore, by following the above-mentioned steps, you can easily remove the primary email address.
2. Remove a Mobile Number from your Apple ID on an iPhone
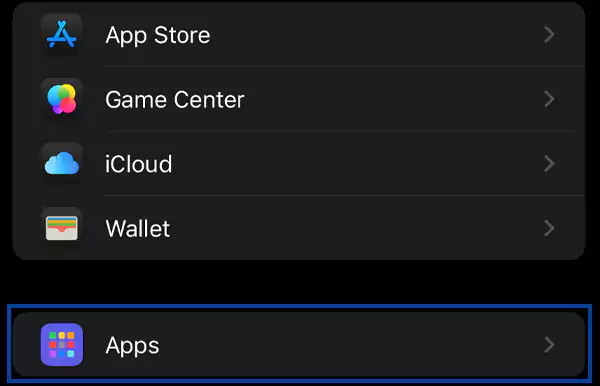
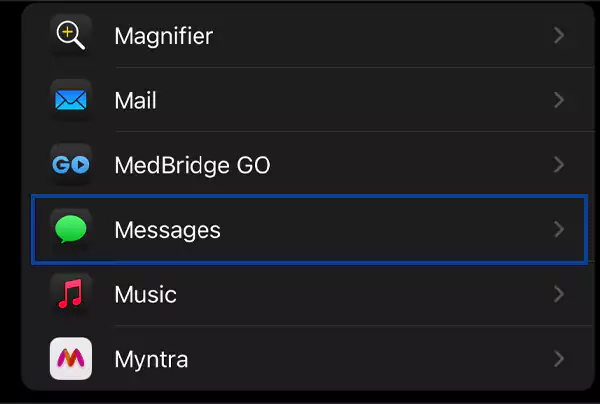
Go to the Settings app on your iPhone.
Locate Apps option.
Navigate to the Messages app.
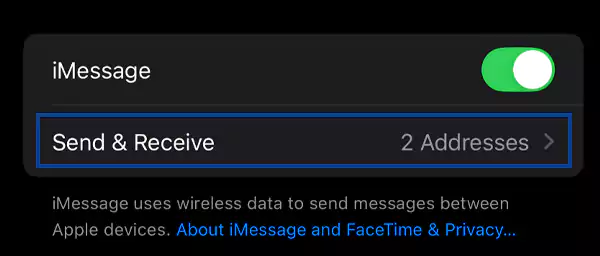
Tap on the Send & Receive option.
Tap on your Primary Mobile Number.
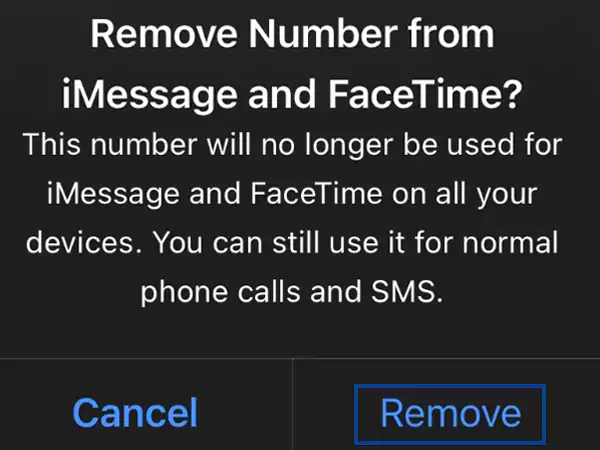
Tap on Remove.
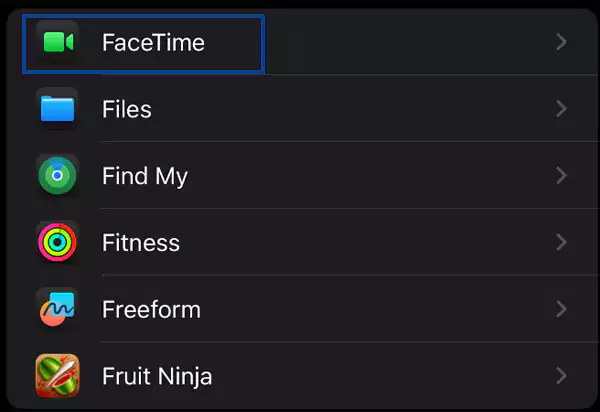
Go back to the Apps option and look for the FaceTime app.
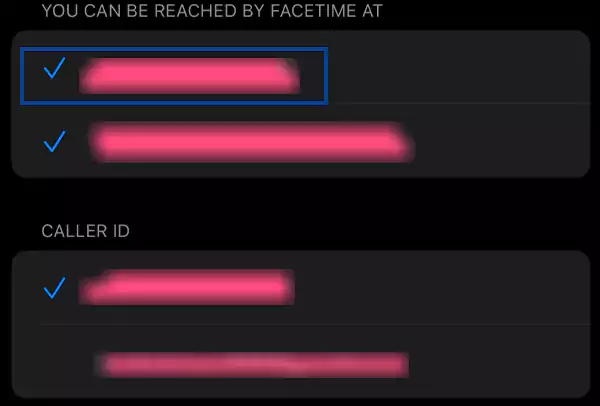
Tap on your Primary Mobile Number.
Tap on Remove.
Go back to the Settings main page.
Tap on Your Name.
Tap Sign-In & Security.
Tap on Edit, in the right corner.
Tap on a red circle, located on the left side of your primary mobile number.
Tap on Delete.
Follow the instructions carefully given on the screen.
As a result, the primary mobile number will be removed.
Therefore, by following the above-mentioned steps, you can easily remove the primary mobile number.
Step-by-Step Instructions to Manage Apple ID Password on iPhone
If you haven’t changed your password in a decade, or have forgotten the password that has been set in your device and now find yourself desperately browsing “How do I change Apple ID password”, then your search ends here.
In this section, we have listed two effective ways to create a new password quickly.
Therefore, adhere to the below steps mindfully.
Update an Old Password to a New One
Open the Settings app on your iPhone.
Tap to Your Name.
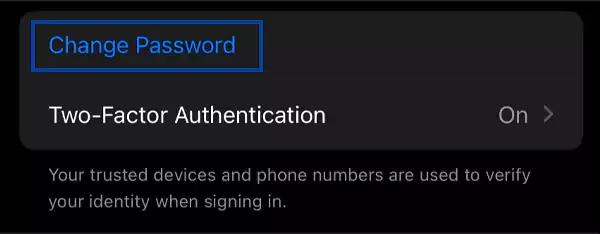
Navigate to Sign-In & Security.
Tap Change Password.
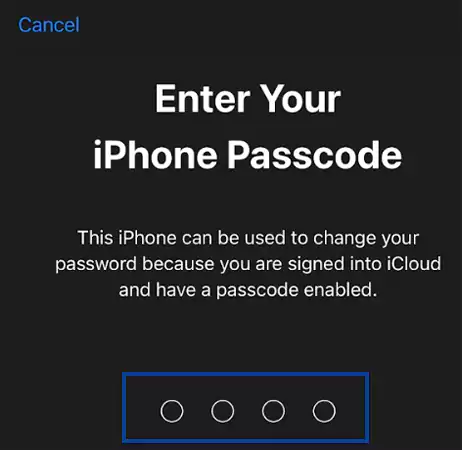
Enter your iPhone Passcode.
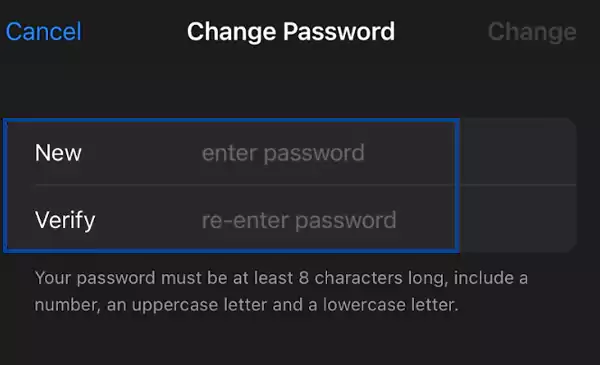
Enter a New Password and verify it by re-entering it.
At the end, tap Change to successfully change your password.
Thus, this is how you can easily create a new password.
2. Create a New Password if You Have Forgotten the Old One
Here are the steps that you can use to recover your apple id if you do not remember:
Navigate to the Settings app on your device.
Tap on your Apple account.
Head over to Sign out and tap on it.
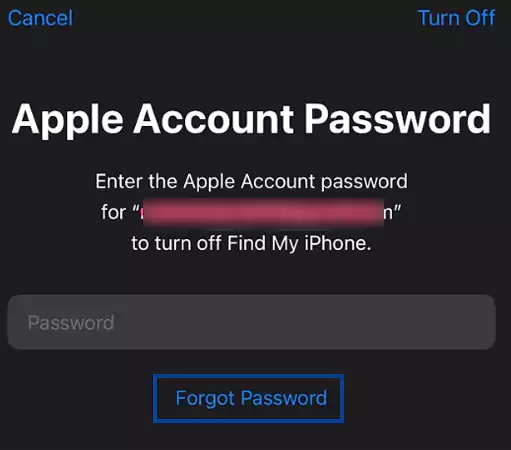
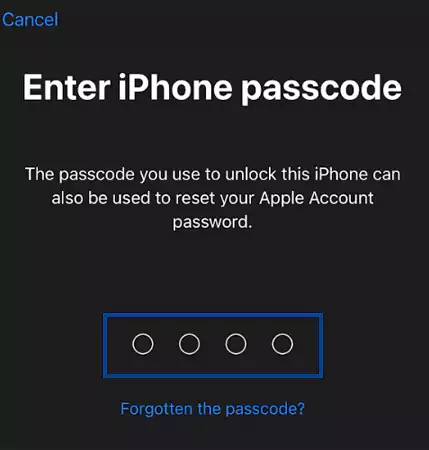
Locate Forgot Password.
Enter your iPhone Passcode.
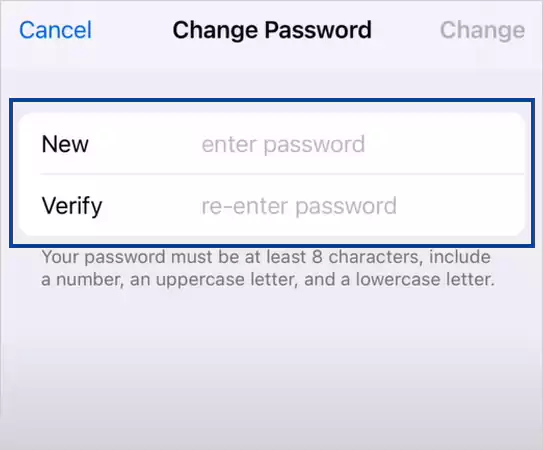
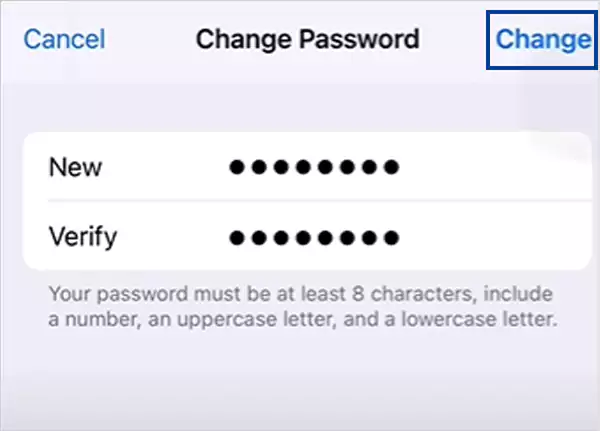
Enter a New Apple ID Password and verify it by re-entering it.
Tap on Change.
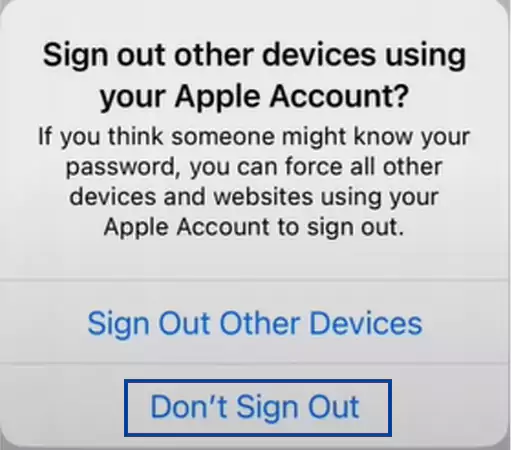
Select the Don’t Sign Out option.
As a result, your new password has been successfully created for your Apple ID.
Thus, by following these steps, you can create a new password to unlock your iPhone and use your device hassle-free.
Note: You can also change your password by searching on your browser, Apple website➡➡ iforgot.apple.com.
How to Avoid Losing Data While Changing Apple ID on iPhone?
You can change your Apple ID, without getting concerned about your important credentials that might get erased from your device. Thus, we have laid out the two effective ways to manage storage during the procedure.
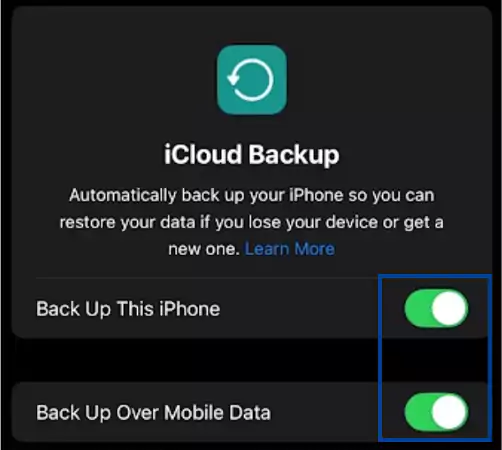
Recheck the Sync Status: First, check that all the toggles are enabled, on your data such as contacts, calendar, and pictures so that when you sign out your Apple ID, your device still holds the sync data.
Take a Backup of Your Data: Later on, after completing a backup of your essential data on your iCloud storage, you can freely sign out of your previous Apple ID and log in to the new one.
Adhere to the steps mentioned above to take a backup on your iPhone.
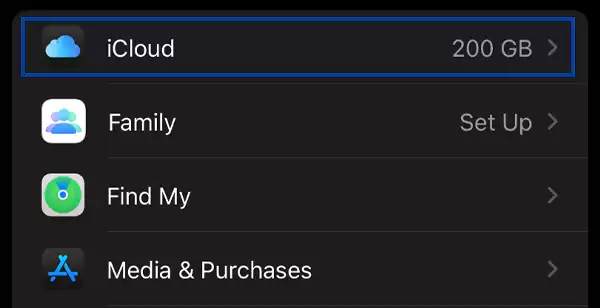
Open the Settings app on your device.
Tap on your Apple ID.
Select the iCloud option.
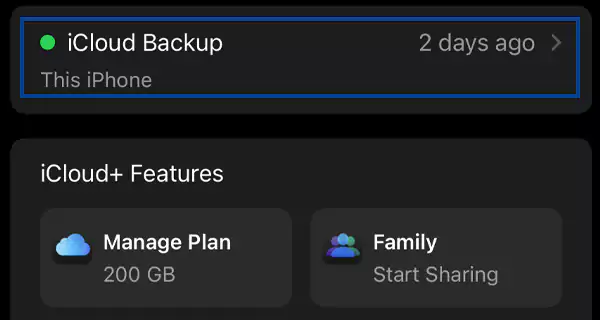
Locate iCloud Backup.
Enable all the toggles.
Therefore, this is how you can easily recheck the sync status. However, these things will allow you to keep a good hold on your data while you are doing an Apple ID switch on your iPhone.
Summing up, now that you know how to change your Apple ID on your iPhone, you can quickly update and maintain your iPhone. And access to all the services and apps that make your iPhone experience enjoyable, without being concerned about your data. You can do this whenever you need to, whether it’s for work, personal reasons, or for a fresh start.
FAQs
Ans: Yes, you can change your Apple ID without losing anything by taking the backup on your device before making the changes.
Ans: Firstly, sign out of the old Apple ID on your device and then create a new Apple ID to switch an Apple ID on your device.