Nod-Krai released Version 6.0 on September 10, 2025, bringing three frozen islands brimming with regional specialties. While “Thermal Lily” and “Frost-Sharded Ore” are not actual item names, the materials you’ll be looking for are Frostlamp Flowers, Moonfall Silver, and Portable Bearings.
These provide food for the new Snezhnayan characters Lauma, Flins, and Aino. Each character requires exactly 168 local specialties to reach Level 90, which means you’re looking at weeks of farming across Lempo, Hiisi, and Paha Isles.
Before diving into the frozen archipelago, consider Genshin Impact top up options to ensure you have enough Genesis Crystals for character pulls. Missing Lauma’s detection passive makes farming noticeably harder.
This guide breaks down every cluster location, optimal farming routes, and the tricks that save you hours of wandering.
Let’s begin!
Key Takeaways
- Understanding the three local specialities of Nod-Krai
- Uncovering the frostlamp flower location
- Exploring Moonfall Silver Location
- Decoding portable bearing locations and essential character farming
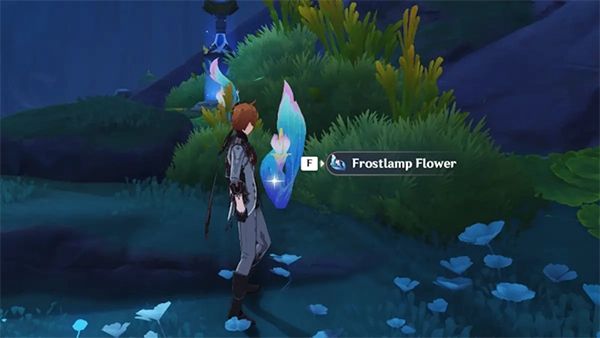
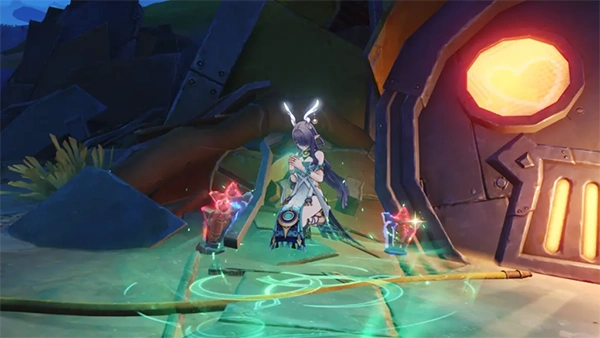
The region introduces three distinct materials tied to specific characters. Frostlamp All three islands have concentrated patches of flowers. These glowing plants favor cliff faces and rocky areas. These are necessary for flins to ascend, and even from a distance, their bright glow makes them easy to spot.
Moonfall Silver appears as crystalline formations embedded in ice and rock. Hiisi Island holds the bulk of these deposits, particularly around shrine complexes and ancient ruins. Lauma’s progression depends entirely on this material. The catch? Some nodes require quest completion to access.
Portable Bearings scatter across mechanical installations and Fatui encampments. Aino’s kit revolves around these technological components. They blend into industrial environments, so detection passives become crucial here.
Interesting Facts
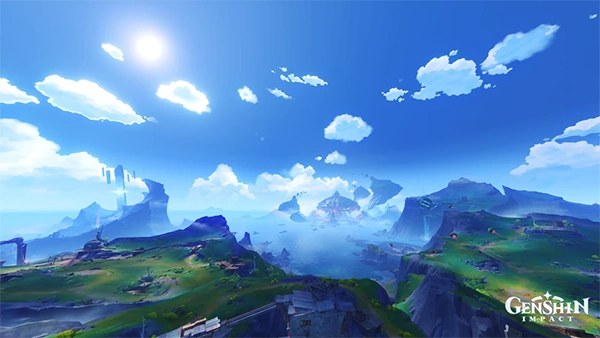
Leaks suggest Snezhnaya will be located in the far northwest of Teyvat, north of Natlan and west of Fontaine, likely featuring high, vertical, and snowy terrain.
Every specialty follows the standard 48-hour respawn timer. This hasn’t changed since launch, and offline time doesn’t accelerate it. Plan your farming sessions around two daily server resets for maximum efficiency. The total available materials per cycle break down like this: 70 Frostlamp Flowers, 71 Moonfall Silver, and 72 Portable Bearings. That’s 213 items every 48 hours across the entire region.
Many players find the respawn system frustrating because it forces you into multi-week farming schedules. Building one character from scratch requires about 16-20 days of consistent collection even with optimized routes.
These beauties distribute themselves evenly across the archipelago. Paha Isle claims 27 flowers, Lempo Isle holds 22, and Hiisi Island rounds out with 21. The distribution actually works in your favor once you establish muscle memory for the routes.
Start at the Clink-Clank Krumkake Craftshop waypoint. Nine flowers cluster immediately around this area. This zone offers the highest density in the region. Work your way northeast toward Blue Amber Lake for another six specimens. The western cliffs near Nasha Town hold the remaining seven flowers along predictable ledges and outcroppings.
The laboratory complex dominates this island’s farming pattern. Fifteen flowers grow around the central research facility. Combat encounters slow you down here, but the concentration justifies it. Northern tunnels provide an alternative stealth route with slightly lower yields. The remaining twelve flowers scatter across southeastern cliffs and underground passages.
The temple complex serves as your anchor point. Twelve flowers grow within the sacred grounds surrounding the central shrine. Northern ruins add six more to your haul. Southern coastal cliffs finish the route with three flowers tucked into hard-to-reach crevices.
The beauty of Frostlamp Flowers? Zero quest locks. You can grab every single one from day one without progressing through any storylines.
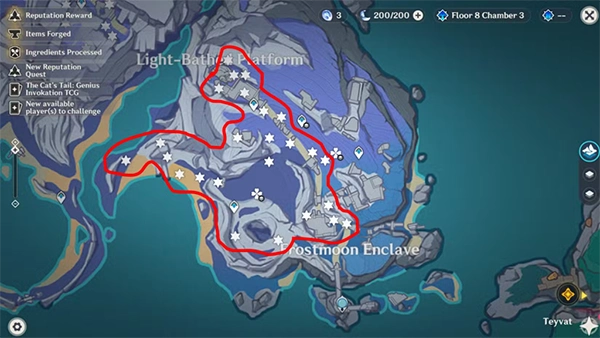
Hiisi Island monopolizes this specialty with all 71 deposits concentrated in one location. This simplifies routing but creates chokepoints around quest-locked areas.
Surface deposits cover most of the island’s northern and central regions. The crystalline formations cluster around ancient architecture and frozen waterfalls. Start at the central shrine waypoint and spiral outward. The northeastern temple ruins provide eighteen crystals in a compact loop. Southern shrine grounds add another twenty-two deposits near glowing pillars and ceremonial platforms.
The final twenty-two crystals hide in Silvermoon Hall and underground chambers. You need to complete specific Archon Quest sequences to access these areas. Trying to farm them before unlocking the zones wastes time. The underground sections open during “The Bell of Mourning Echoes” quest chain.
Here’s the thing most guides don’t mention: those missing crystals won’t prevent you from starting Lauma’s ascension. The accessible 49 units give you enough for the first few levels. Just don’t expect to max her immediately without quest progression.
These technological components scatter across all three islands but favor Paha Isle’s industrial zones. Lempo holds the majority with strategic placement around Fatui installations.
Blue Amber Lake’s northeastern shore contains twelve bearings near mechanical debris. The Fatui outpost northwest of Nasha Town contributes another fourteen units. Aino’s workshop area provides six additional bearings mixed with other crafting materials.
Paha Isle Clusters (25 Bearings)
The laboratory complex offers concentrated farming with eighteen bearings throughout the facility. Eastern research stations add seven more to your collection. Combat is mandatory here since Fatui guards protect most nodes.
This island has fewer technological installations, so bearing distribution remains sparse. The northern edge near Fatui camps holds eight units. Southern anomaly zones contribute the remaining seven bearings.
Detection passives shine with Portable Bearings because they blend into complex environments. Aino’s Miniaturized Detection Sensor specifically highlights these on your minimap.
Efficiency comes from proper sequencing and character selection. This route collects approximately 60-70 materials per session depending on movement speed and combat encounters.
Teleport to Nasha Town waypoint. Sweep Blue Amber Lake for Frostlamp Flowers and Portable Bearings. Hit Aino’s workshop cluster. Transition to northwestern cliffs for remaining Lempo specialties.
The laboratory complex demands the most time due to combat. Clear the facility for maximum Portable Bearing yield. Grab surrounding Frostlamp Flowers during downtime. Underground tunnels offer a stealth alternative if you’re avoiding fights.
Central shrine hub provides dense Moonfall Silver collection. Northern ruins temple adds more crystals and flowers. Southern cliffs wrap up the route with mixed specialty gathering.
This sequence minimizes backtracking and leverages natural island transitions. Wind currents connect major zones, so learn their locations.
| Island | Frostlamp Flowers | Moonfall Silver | Portable Bearings | Total |
| Lempo Isle | 22 | 0 | 32 | 54 |
| Paha Isle | 27 | 0 | 25 | 52 |
| Hiisi Island | 21 | 71 | 15 | 107 |
| Total | 70 | 71 | 72 | 213 |

Three Nod-Krai characters provide detection passives that transform farming efficiency. Lauma’s “Prayers for the Forest” highlights specialties on your minimap. Her white deer transformation form crushes vertical challenges and distance coverage. This passive alone cuts farming time by 30-40%.
Flins brings “A Light in the Dark” detection with similar functionality. Aino’s “Miniaturized Detection Sensor” specifically excels at revealing Portable Bearings hidden in mechanical contraptions.
Beyond detection passives, standard exploration setups apply. Anemo Resonance remains non-negotiable for that 15% stamina reduction. The cumulative effect over a 30-minute route matters more than you’d think. Mona or Ayaka handle water traversal elegantly. Pack a solid DPS unit because Paha Isle throws combat at you constantly.
Stamina food deserves special mention. Northern Smoked Chicken, Barbatos Ratatouille, Jade Parcels, whatever works for your playstyle. Nod-Krai’s vertical design burns through stamina faster than Mondstadt or Liyue ever did.
The Official Genshin Interactive Map finally supports real-time marking and material filters. This feature changes everything about route planning. You can plot entire circuits before launching the game, mark collected nodes, and track your progress across sessions.
The in-game tracking system works decently when selecting materials from character screens. It highlights general zones on your world map with blue circles showing approximate locations. That said, it lacks the precision of third-party tools for pinpointing exact spawn points.
Mark your custom routes and save them. Future farming sessions become autopilot exercises once muscle memory kicks in.
Trying to collect quest-locked Moonfall Silver without proper Archon Quest progression tops the list. Too many players waste hours hunting for those missing 22 units from Silvermoon Hall, then wonder why their counts don’t match up. Check your quest log before blaming RNG.
Ignoring detection passive characters is another efficiency killer. Running standard exploration teams might feel comfortable, but you’re leaving time and resources on the table. Swap in Lauma, Flins, or Aino even if they’re under-leveled. The passive works regardless of stats.
Skipping stamina food seems minor until you’re stuck at the bottom of a cliff watching your gauge drain. Keep buffs active throughout your route.
Ans: Nod Krai is an autonomous territory within Snezhnaya.
Ans: The next region in Genshin Impact after Natlan will be Snezhnaya.
Ans: No, there is no 4.9 version in Genshin Impact.