Open Broadcaster Software or OBS screen recorder is a comprehensive yet versatile free and open-source tool that contains significant potential for live-streaming or recording your computer display. It is also among the widely used applications to live-stream content, such as gameplay, and seamlessly capture screens with high resolution and clear audio.
However, several users often find it complex to initially install and set up the OBS Studio screen recorder to achieve optimal video and audio output. Furthermore, to assist you in easily setting up and achieving high-quality output, we have mentioned comprehensive steps from initial installation to advanced settings.
How Does an OBS Screen Recorder Work? Features and Layout
OBS (Open Broadcaster Software) is a flexible yet robust tool that serves the purpose of capturing, blending, and processing various media sources, including webcams, audio systems, and screen captures. These are later stored and organized into the “Scenes” section, which is utilized to live-stream content or store files to your device.
Furthermore, OBS screen recorder has a beginner-friendly and intuitive interface that contains features such as:
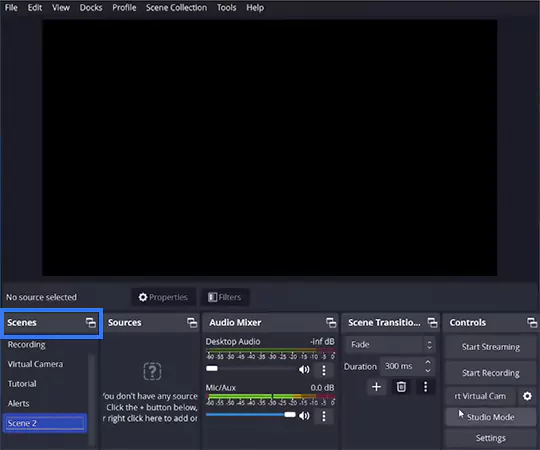
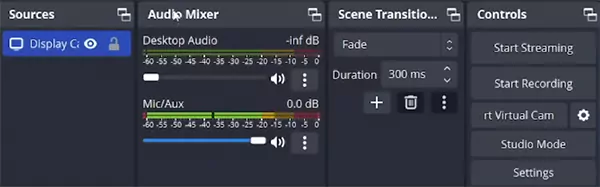
Scenes Section: This tab is placed at the bottom left, which is a collection of different scenes or audio and video generated from different media sources. Subsequently, you can also use the scene box to develop a different layout or switch between live streaming and recording.
Audio and Video Source Management: You will find the settings to configure audio and video sources, including the choice to utilize system audio or a microphone, along with webcam or screen capture for live streaming and recording.
Video Blending and Scene Transitions: This is a significant feature that equips you with the potential to mix different videos in real time, along with transitioning between several scenes with cut, fade, swipe, or stinger animations.
Audio Mixer: The audio mixer features allow you to notably adjust the audio in recording for volume or trimming. Furthermore, it also has a multi-track audio mixer that has per-source filters, which equips you with enhanced control over audio input and output.
Seamless Streaming and Recording: The primary feature of the screen recorder OBS is its prominent capability to simultaneously perform live streaming and recording, along with adjustable quality settings. Furthermore, it also supports major streaming platforms such as YouTube and Twitch.
Adjustable Hotkeys: Open Broadcaster Software screen recording allows the customization of hotkeys for several actions, such as switching or mixing scenes and starting or stopping the recording.
Real-time Audio and Video Recording: Using OBS for screen recording lets you record and mix the best quality videos and audio simultaneously in real time to deliver enhanced content during live streams.
Filters and Effects: It has a vast range of captivating filters and effects for sources, including a color correction option with LUTs, chroma key for green screen, background removal, noise reduction, frequency equalization, and image masking.
Configuration Options and Preview Window: OBS Studio screen recorder offers you advanced configuration settings, such as frame rate and bitrate control, support for different encoders, and keyframe interval. Following this, it also has a preview window that allows you to preview or check the video and audio quality.
Tips to Easily Install and Set Up OBS Studio Screen Recorder
While OBS Screen Recorder is a free and open-source application that has an intuitive layout and powerful features, it still requires a learning curve to initially install and configure. However, to assist you further, we have mentioned specific pointers for the installation and setup guide.
Detailed Steps to Easily Install OBS Studio Screen Recorder
Read out the pointers mentioned below to understand how you can simply download and install the latest version of OBS screen recorder on any of your devices.
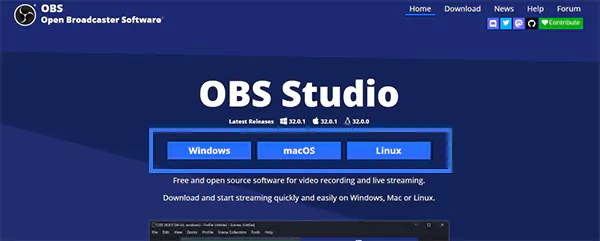
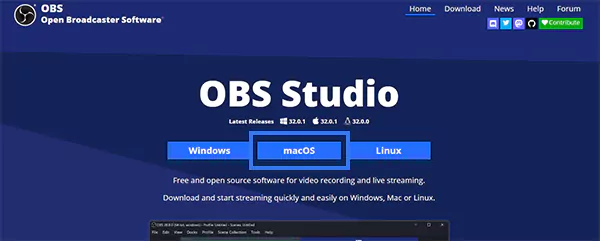
Visit the official OBS Studio website to select and download the installer for your operating system.
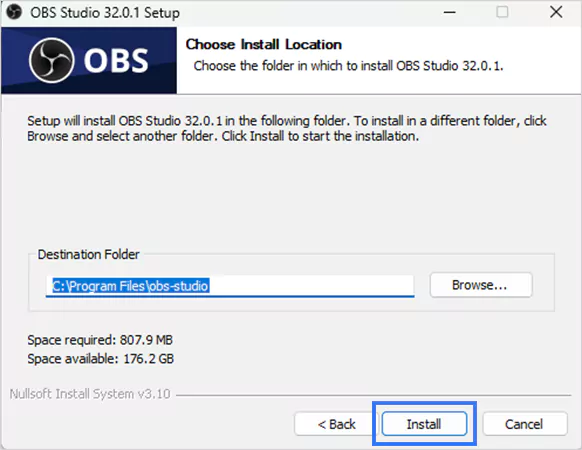
Open the installer file and follow the on-screen prompts to finish installing OBS screen recorder.
Detailed Steps to Easily Set Up OBS Screen Recording
Once you have finished the installation process, you can follow these simple yet effective steps to configure OBS for screen recording.
Video Settings: To configure the primary video settings for OBS recording, simply click on the Settings menu and select Video. Afterwards, set the base or canvas resolution according to the screen size of your display and configure the output or scaled resolution to one of your preferred smaller resolutions.
Furthermore, we recommend setting the downscale filter to Lanczos to achieve the highest quality. Additionally, adjust the FPS value to 30 or 60 fps, depending on your content requirements.
Webcam Settings: To utilize your webcam for OBS screen recording, it is essential to add your webcam as a source.
Subsequently, doing this requires opening the Sources section and clicking on the + option to add any other source. Later, choose the option of Video Capture Device and select your webcam from the dropdown menu to record the screen with OBS.
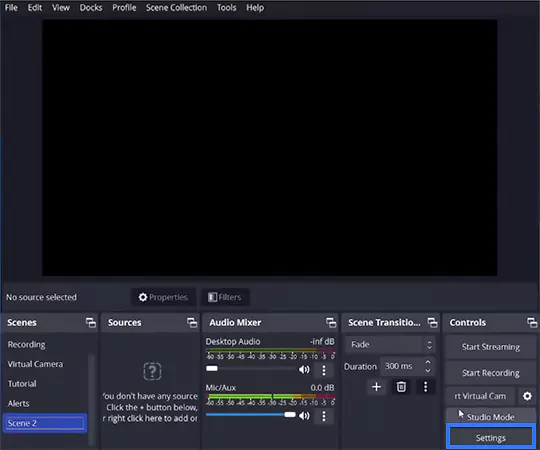
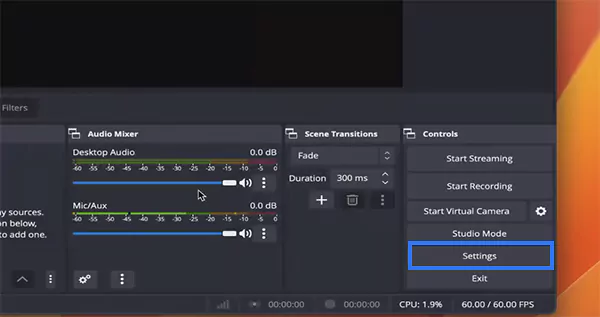
Audio Settings: If you wish to record audio with OBS screen recording, it is crucial to select the correct audio inputs. To do this, move to the Controls section and select the Audio option from the Settings tab. The Audio tab will have the options to choose any of your preferred audio inputs from the available options of system audio or microphones.
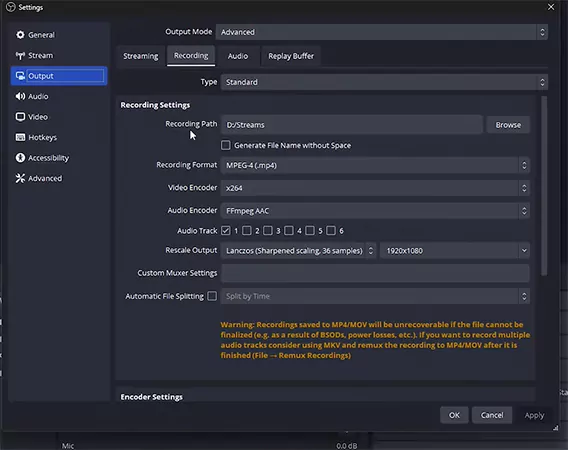
Output Settings: It is essential to set up the best settings for OBS recording according to your streaming or recording requirements. However, we suggest focusing on the Recording section and selecting from the Beginner or Advanced options as per your requirement.
Furthermore, select your recording path and folder to save your Obs Recording, along with selecting an encoder and adjusting the capture format.
Essential Plugins: Since it is an open broadcaster software screen recording, it supports plugins for enhanced functionality. Obs screen recorder has a vast list of 202 community-created plugins that you can download and access from the OBS website. You can install them after downloading from the drop-down menu.
How to Utilize OBS Screen Recorder to Record Screen on Windows?
Recording your PC screen via OBS screen recorder is a hassle-free process that you can accomplish by following the steps listed below. However, make sure your PC has Windows 8.1, Windows 10, or Windows 11 to perform recording with OBS.
Download and install OBS Studio screen recorder after selecting the installer for the Windows operating system.
Launch the program and hover over the Scenes section by clicking the + icon in the bottom left section.
Now, configure the settings as per your requirement for video, audio, output, hotkeys, etc.
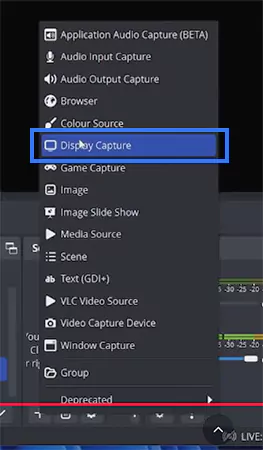
Select the Display Capture option after clicking on the + icon placed under the Sources section.
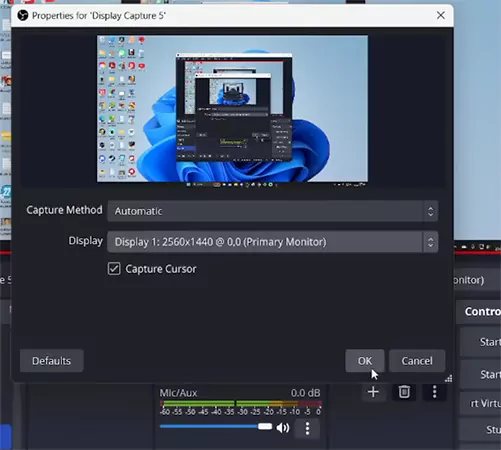
Choose the Capture Method and Display option, along with selecting or deselecting the Capture Cursor option if you wish to show the cursor in the OBS screen recording.
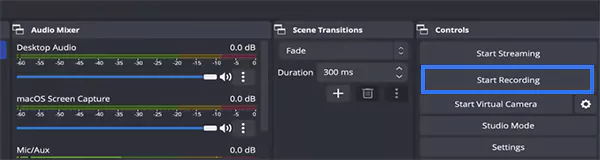
Click on the Start Recording button placed in the Controls section to start or stop the OBS record screen.
The open broadcaster software record screen setting and setup is straightforward and similar to Windows. But to assist you better in setting up OBS Studio screen recorder for macOS, we have listed easy pointers below.
Download and install OBS screen recorder after selecting the installer for the macOS operating system.
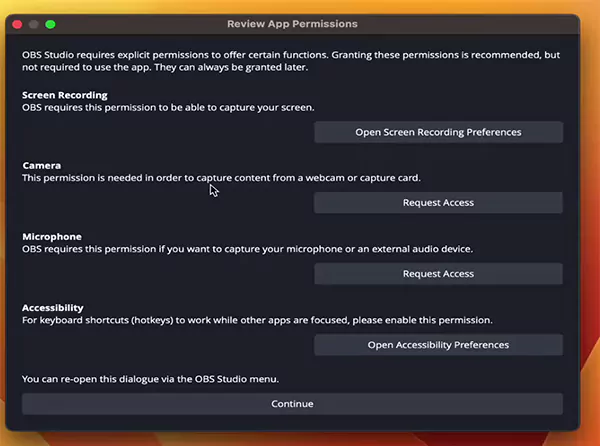
Launch the app and click on Continue after reviewing app permissions for OBS Studio screen recording.
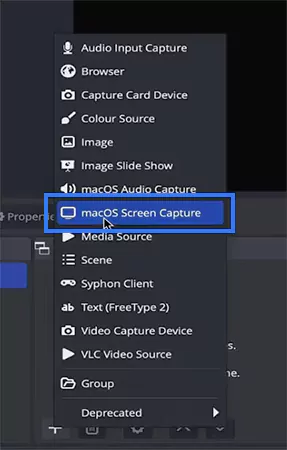
Move to the Sources section and click on macOS Screen Capture after clicking on the + icon.
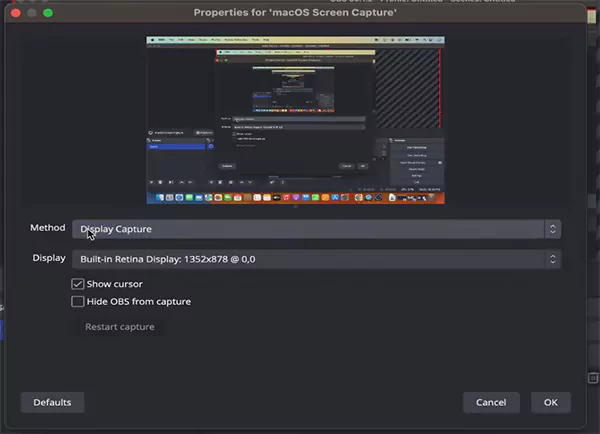
Select the Method and Display from the available options, along with the choice to show the cursor and hide OBS from capture.
Configure the Settings as per your requirement for video, audio, hotkeys, output, and Recording path and folder.
Now you can click on the Start Recording button to start or stop your recording to the destination folder.
How to Use OBS Recording to Record Screen on iPhone and Android?
While there is no OBS Studio screen recorder app available yet for mobile devices, you can still use your iPhone or Android device as a webcam for OBS recording.
Alternatively, you can also capture the complete mobile device display using Open Broadcaster Software screen recording. To do this, you can simply follow the points mentioned below
Tips to Capture an iPhone or Android Screen Using OBS Studio Screen Recorder
Connect your iPhone or Android to the Mac or PC with the use of a Lightning or USB-C connector to record your iPhone screen.
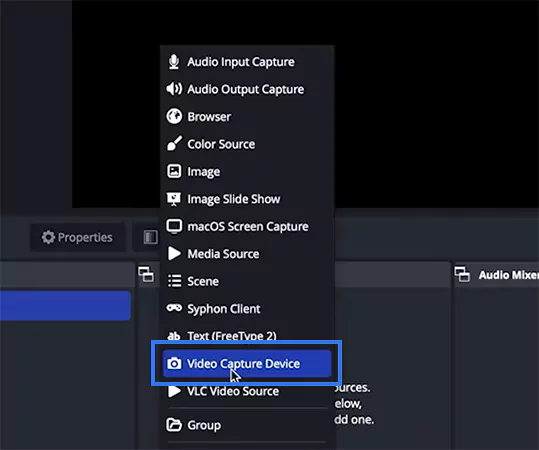
Launch your OBS screen recorder and click on the VideoCapture Device after clicking on the + tab placed in the Sources box.
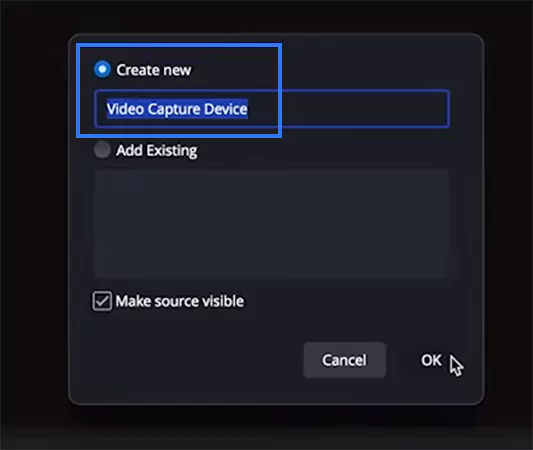
Select the Create New option from the pop-up menu, and then click on OK to proceed further.
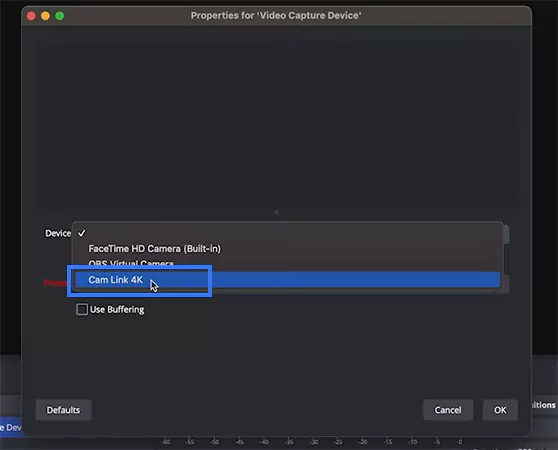
Select your iPhone or Android option, or a Cam Link 4K option from the Devices section, and click on OK. Then, you can simply Start Recording.
Tips to use an iPhone or Android as a Webcam to Screen Record with OBS
Download a compatible app such as Camo, HX Camera, or EpocCam to utilize your mobile camera as a webcam. Also, make sure to configure your downloaded app, like Cam,o to connect it with OBS.
Open the screen recorder OBS, and click on the Video Capture Device after clicking on the + tab located in the Sources box.
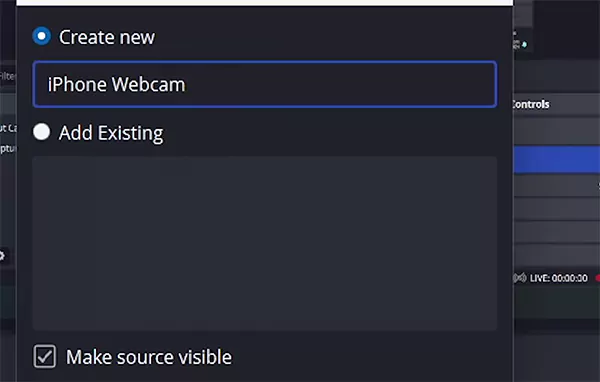
Select the Create New option and enter a nickname for your camera, such as iPhone Webcam, and click OK.
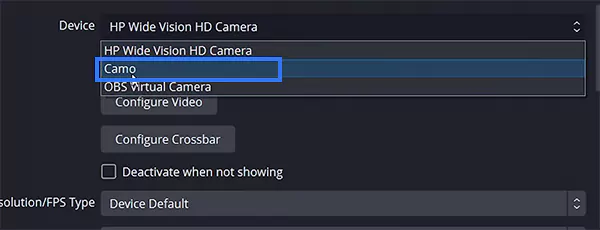
Select the app that you have downloaded, such as Camo, from the Device tab and click on OK. Then you can click on Start Recording, and it will use your mobile device as a webcam.
Methods to Record System Audio and Sound With OBS Screen Recorder
To achieve the best results and high-quality audio from OBS screen recording, it is essential to set up audio and system sound effectively. To analyze this in detail, you can refer to the points mentioned below.
Recording System Sound with OBS Screen Recorder
Launch OBS Studio screen recorder and locate the Sources section to click on the + icon.
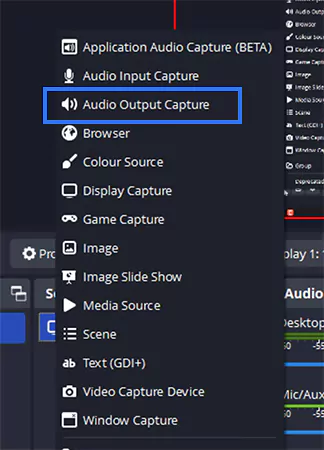
Select Audio Output Capture from the section and click on OK from the Create New pop-up menu.
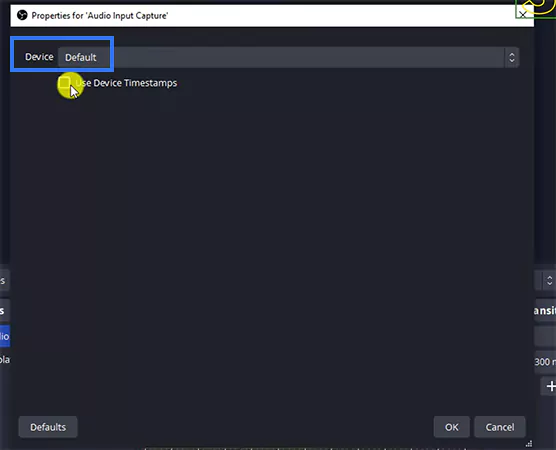
From the Default drop-down menu, select the default audio output device of your computer and click OK to complete.
Record Screen With OBS Using a Microphone
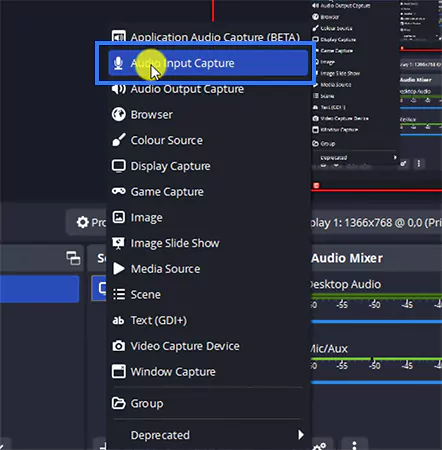
Open the Open Broadcaster Software screen recording and click on the + icon placed in the Sources box.
Select Audio Input Capture and click on OK after naming your source in the Create/ Select Source pop-up menu.
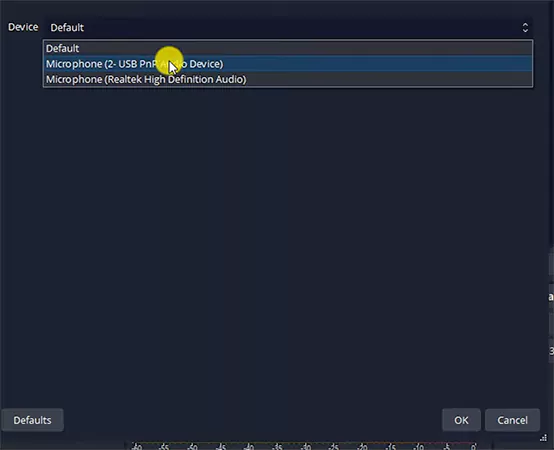
From the drop-down menu next to the Device section, select your preferred microphone from the menu.
Once you have completed capturing and clicked on Stop Recording, the video files or output will be automatically saved in your Windows or Mac in the default Videos folder. Alternatively, you can also click on File and then select Show Recordings from the drop-down menu to locate OBS screen recording.
However, you also have the option to save the output or video files to your preferred location on your device. To do this, follow the steps mentioned below:
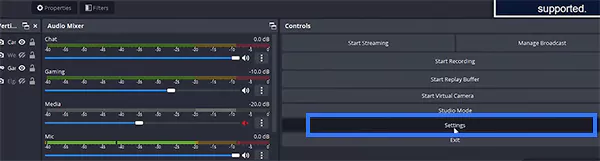
Click on the Settings tab located under the Controls section.
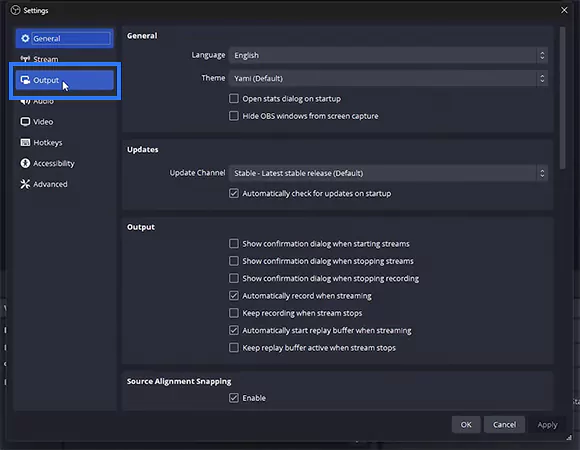
Select the Output option from the pop-up menu.
You will find the Recording Path option by clicking on the Recording tab. There, you need to click on Browse and select your preferred destination folder.
While OBS screen recorder is a robust and flexible tool to seamlessly record the screen and live-stream content, its setup and operating procedure require a learning curve.
However, after following the detailed steps we have mentioned, you can grasp a comprehensive understanding of its setup and settings to achieve stunning output. Furthermore, we also suggest configuring video, audio, and output settings based on requirements and as per your computer’s GPU potential.
FAQs
Ans: To record a specific game through OBS screen recording, you can use the game capture source present in the Sources section> + icon> Game Capture. Alternatively, you can also use Application Audio Capture (Beta) from Sources> + icon> Application Audio Capture.
Ans: Yes, OBS is an open-source and free screen recorder that offers flexibility and powerful tools to record or live-stream content seamlessly.
Ans: Yes, OBS screen recorder can capture the entire screen that you enable via Sources > + icon > Display Capture.
Ans: OBS is an open-source and free screen recorder that can be used for streaming and recording high-quality audio and video as per your requirement.